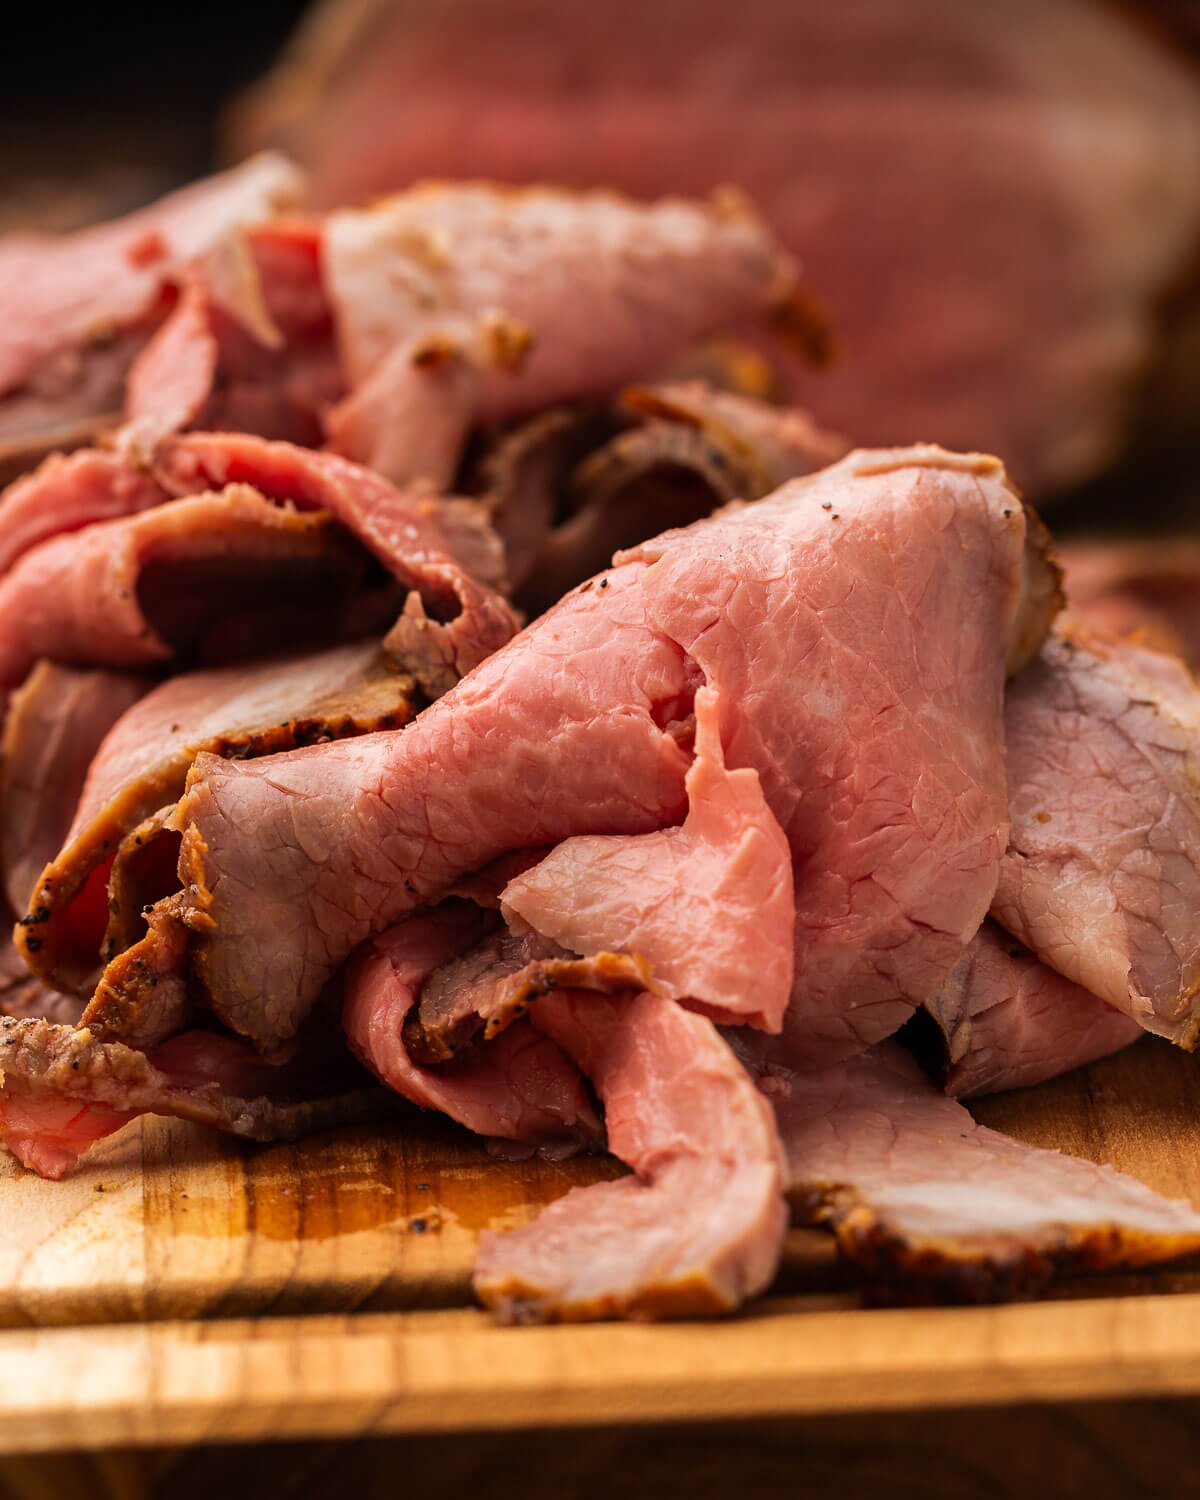
Whether you’re making French dip sandwiches, American-style deli heroes, or enjoying it by the slice, there’s nothing quite like homemade Deli-style Roast Beef. Perfectly cooked, thinly sliced, and loaded with rich beefy flavor, this is the budget-friendly way to stock up on roast beef cold cuts!
This post may contain affiliate links. Our disclosure policy.
As much as I love Boar’s Head cold cuts, I can’t justify springing for the high prices we’re seeing lately.
For much less money, and a little bit of time, you can make your own deli roast beef in the comfort of your own home.
It’s easier than you might think, and the best part is you can use the pan drippings to make a jus which is the perfect complement to the beef itself and any sandwich you choose to pile it on!
Recipe Ingredients
All ingredients for this recipe are shown in the pic below and special notes are made in this bulleted list to assist you.
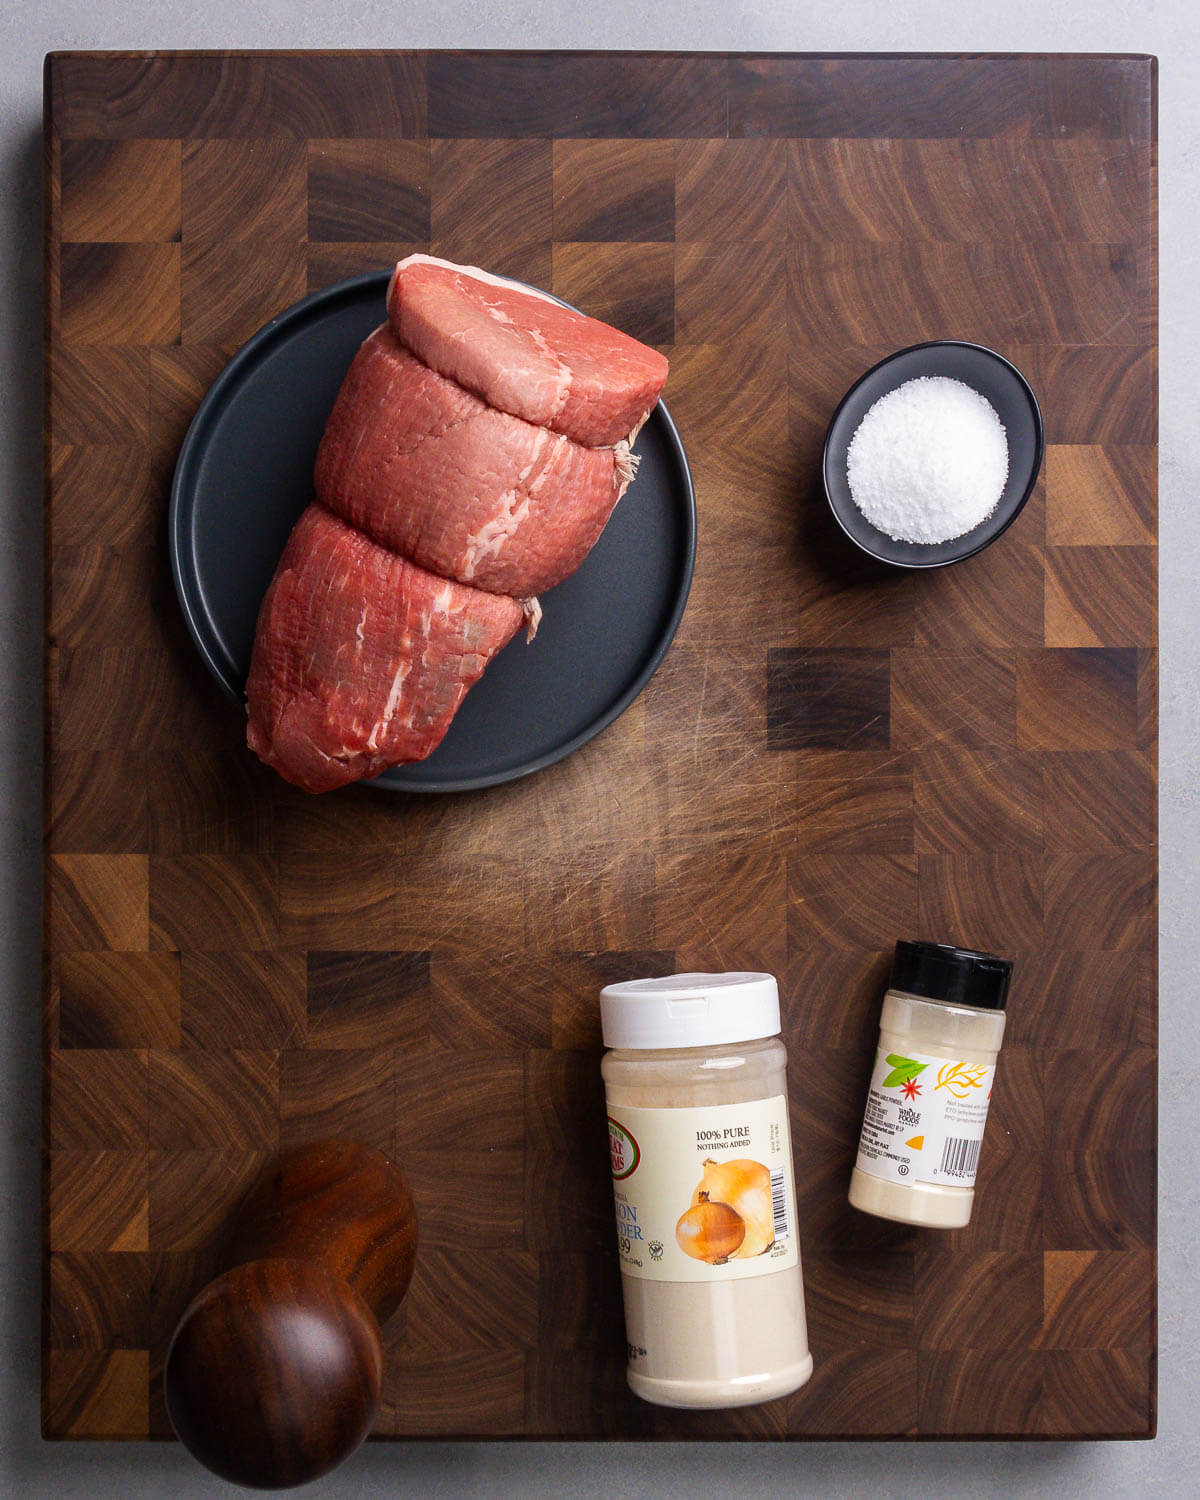
- Beef. I’m using an eye of round roast for this recipe. They’re typically sold as 3-4 lb roasts. You can also use top round or rump roast with great results.
- Salt. This ingredient is key to dry brine the roast beef. I prefer to use Diamond Crystal kosher salt because it’s easier to grab and distribute over the beef. That being said, you can use any salt, as long as it’s 15 grams worth. The 1 1/2 tablespoons listed in the ingredients is specific to the volume of Diamond Crystal kosher salt.
- Seasoning. In addition to the salt, I’m using a combination of garlic power, onion powder, and black pepper. I’ve found this blend works best when trying to replicate the type of roast beef you’d buy from your local deli.
See the recipe card for full information on ingredients and quantities.
How to make it
Each number corresponds to the numbered written steps below.
- Place a ~3-pound eye of round roast on wire rack set on top of a baking sheet. Season the roast evenly on all sides with 1 1/2 tablespoons (15g) of Diamond Crystal kosher salt, 1 teaspoon of garlic powder, 1 teaspoon of onion powder, and 1 teaspoon of black pepper. Allow the roast to sit at room temperature with the dry brine for at least 90 minutes before roasting. Note: I’m using a roughly 1.25% salt to meat ratio. 3 pounds of eye round is 1362 grams. 1% would be 13.6g and 1.25% would be 17g. If using a larger roast just multiple the gram amounts by .0125 and you will be good to go.
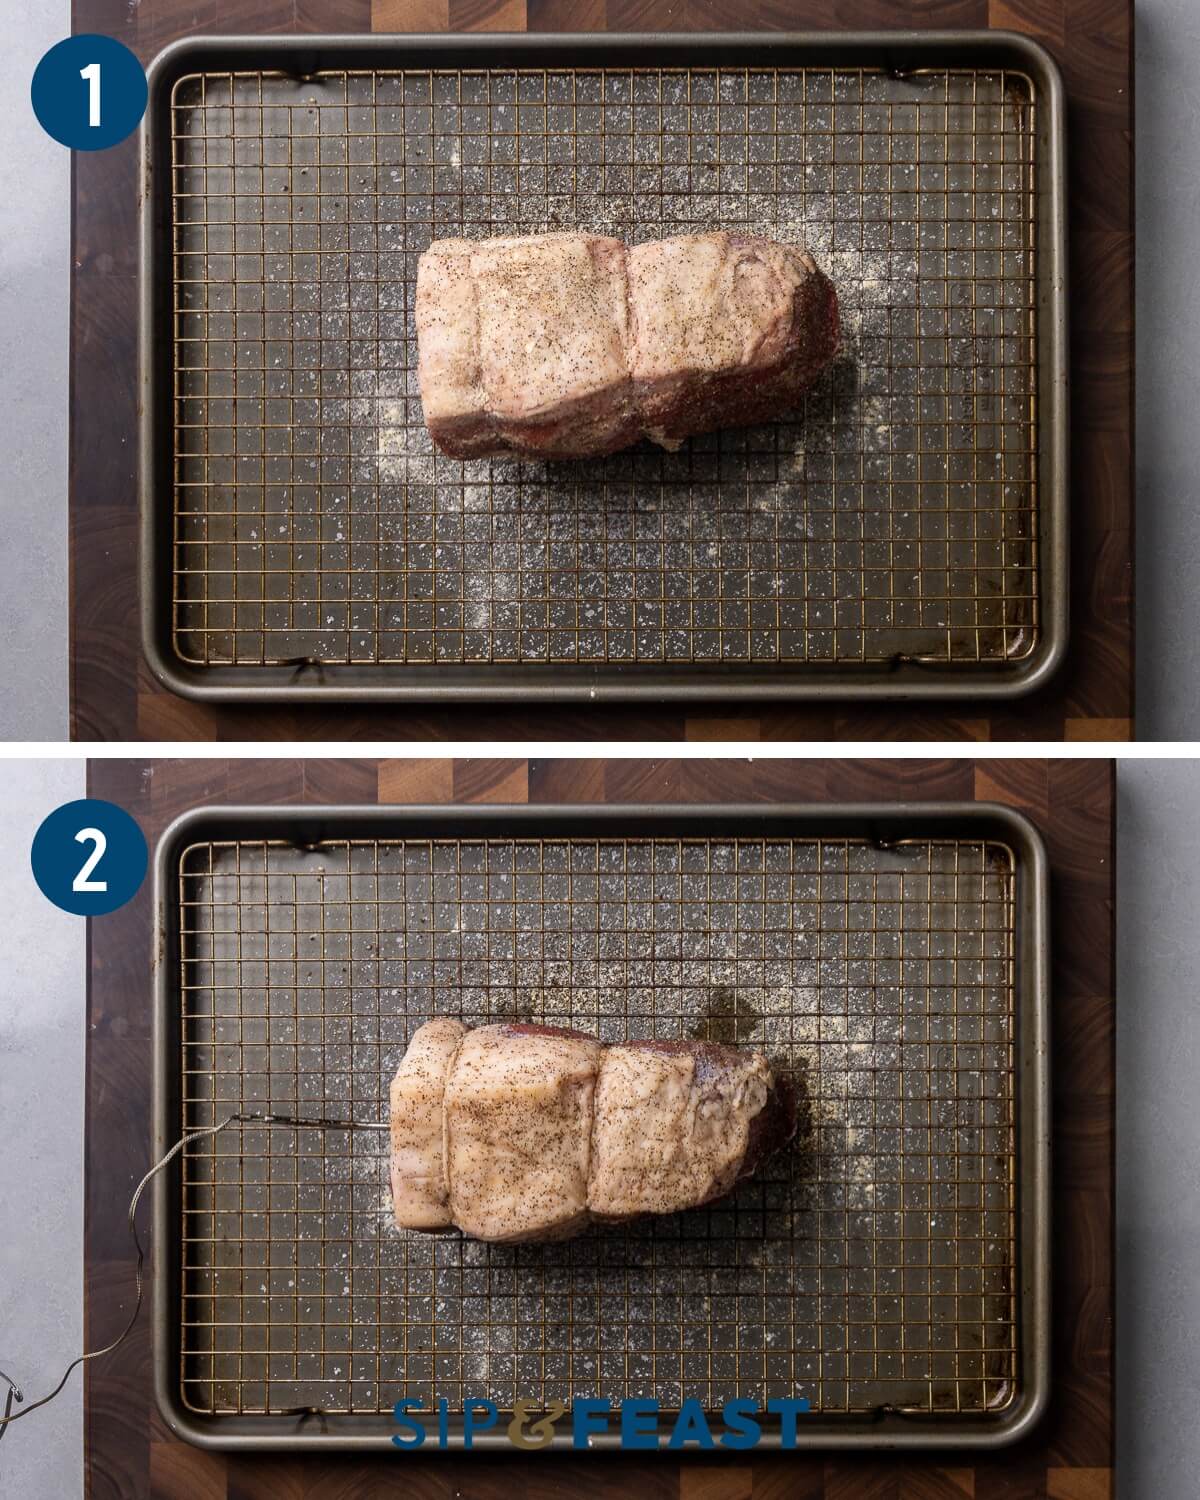
- Preheat the oven to 500f and place the roast on the rack so the fat cap is facing up. Insert an oven-safe digital thermometer into the exact center of the roast. Pat the roast dry to remove any water that may have wicked to the top and place the roast in the oven to cook for 15 minutes, then drop the temperature to 300f and continue cooking.
- Once the roast reaches 110-115f for rare, 125f for medium-rare, or 135f for medium, remove it from the oven and place it on a different wire rack (one that is not warm) to cool for 1 hour.
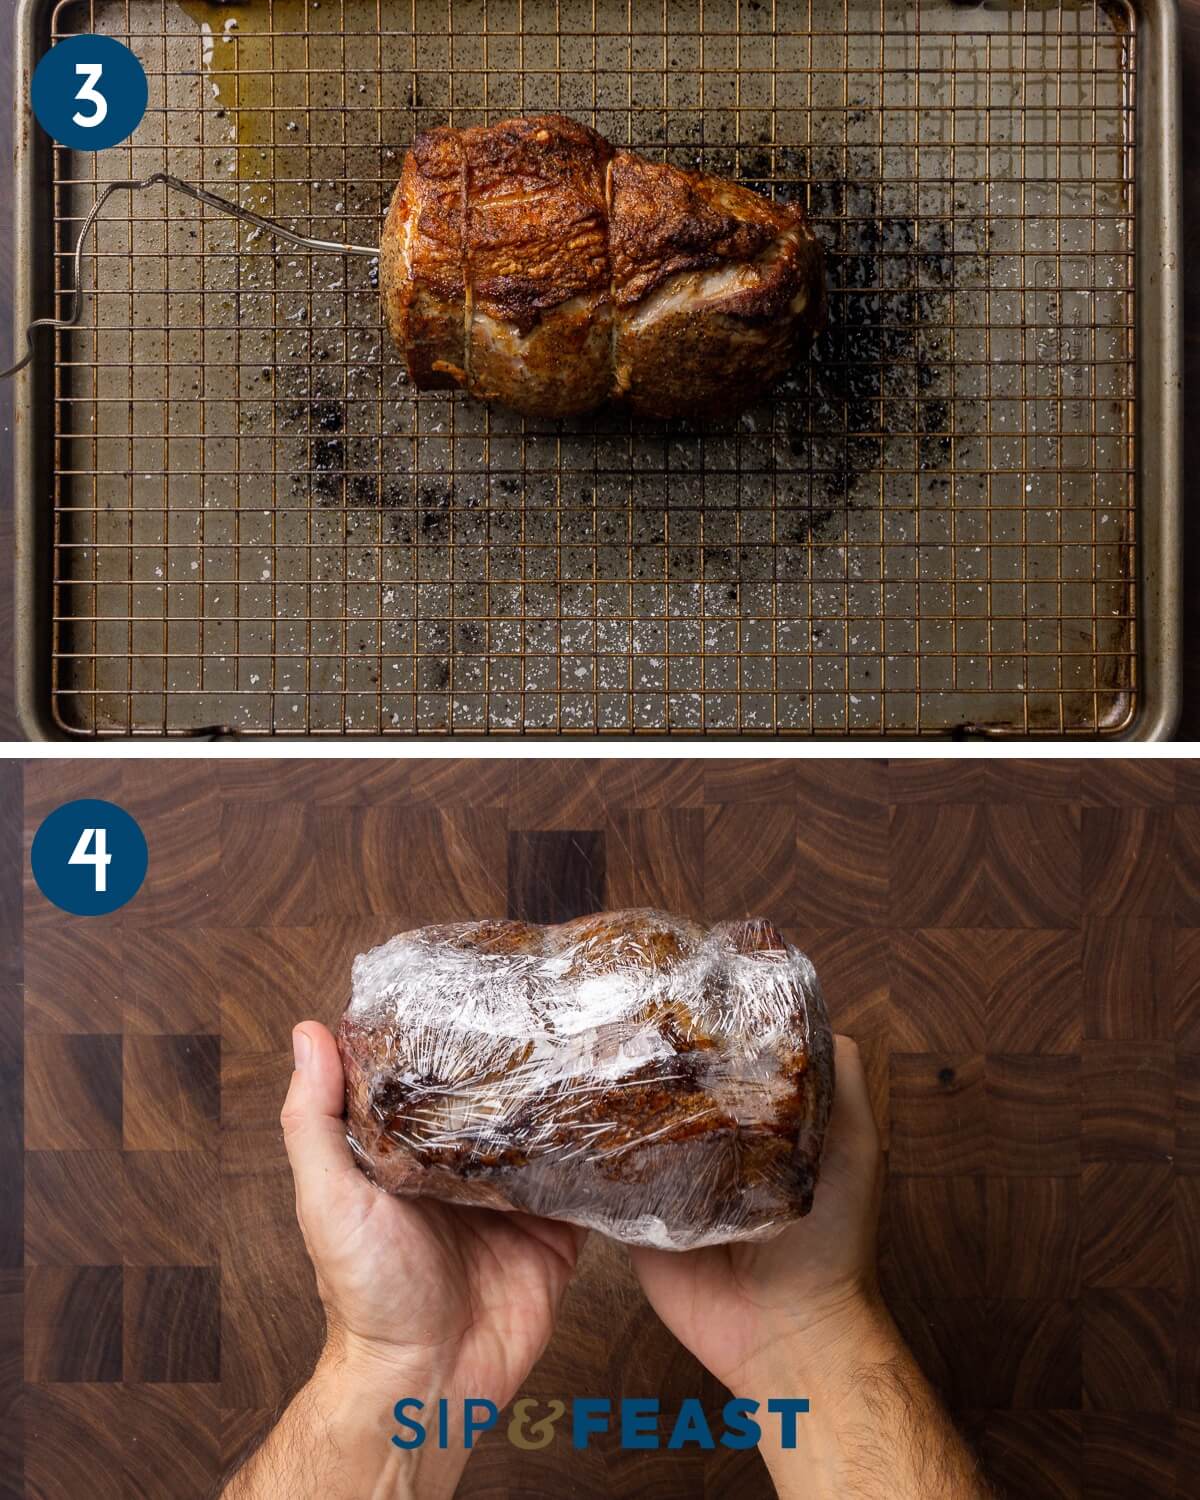
- After 1 hour of cooling, wrap the roast with plastic wrap and refrigerate for at least 2 hours, but preferably overnight. Note: If you want to eat it fast, you can throw it in the freezer for 1 hour, but it better absorbs the juices back into the meat when placed in the fridge overnight.
- Optional: In the meantime, you can use the drippings in the pan to make a simple jus (beef juice like Arbys). Place the pan on a burner over medium heat and add 1 tablespoon of flour and whisk until white spots no longer appear (about 1-2 minutes). Add 1 1/2 cups of low-sodium beef stock and use a wooden spoon to scrape the bottom and dislodge any brown bits. Simmer the jus for a few minutes and taste test. You most likely won’t need any salt. For more details on making it, see my prime rib au jus recipe.
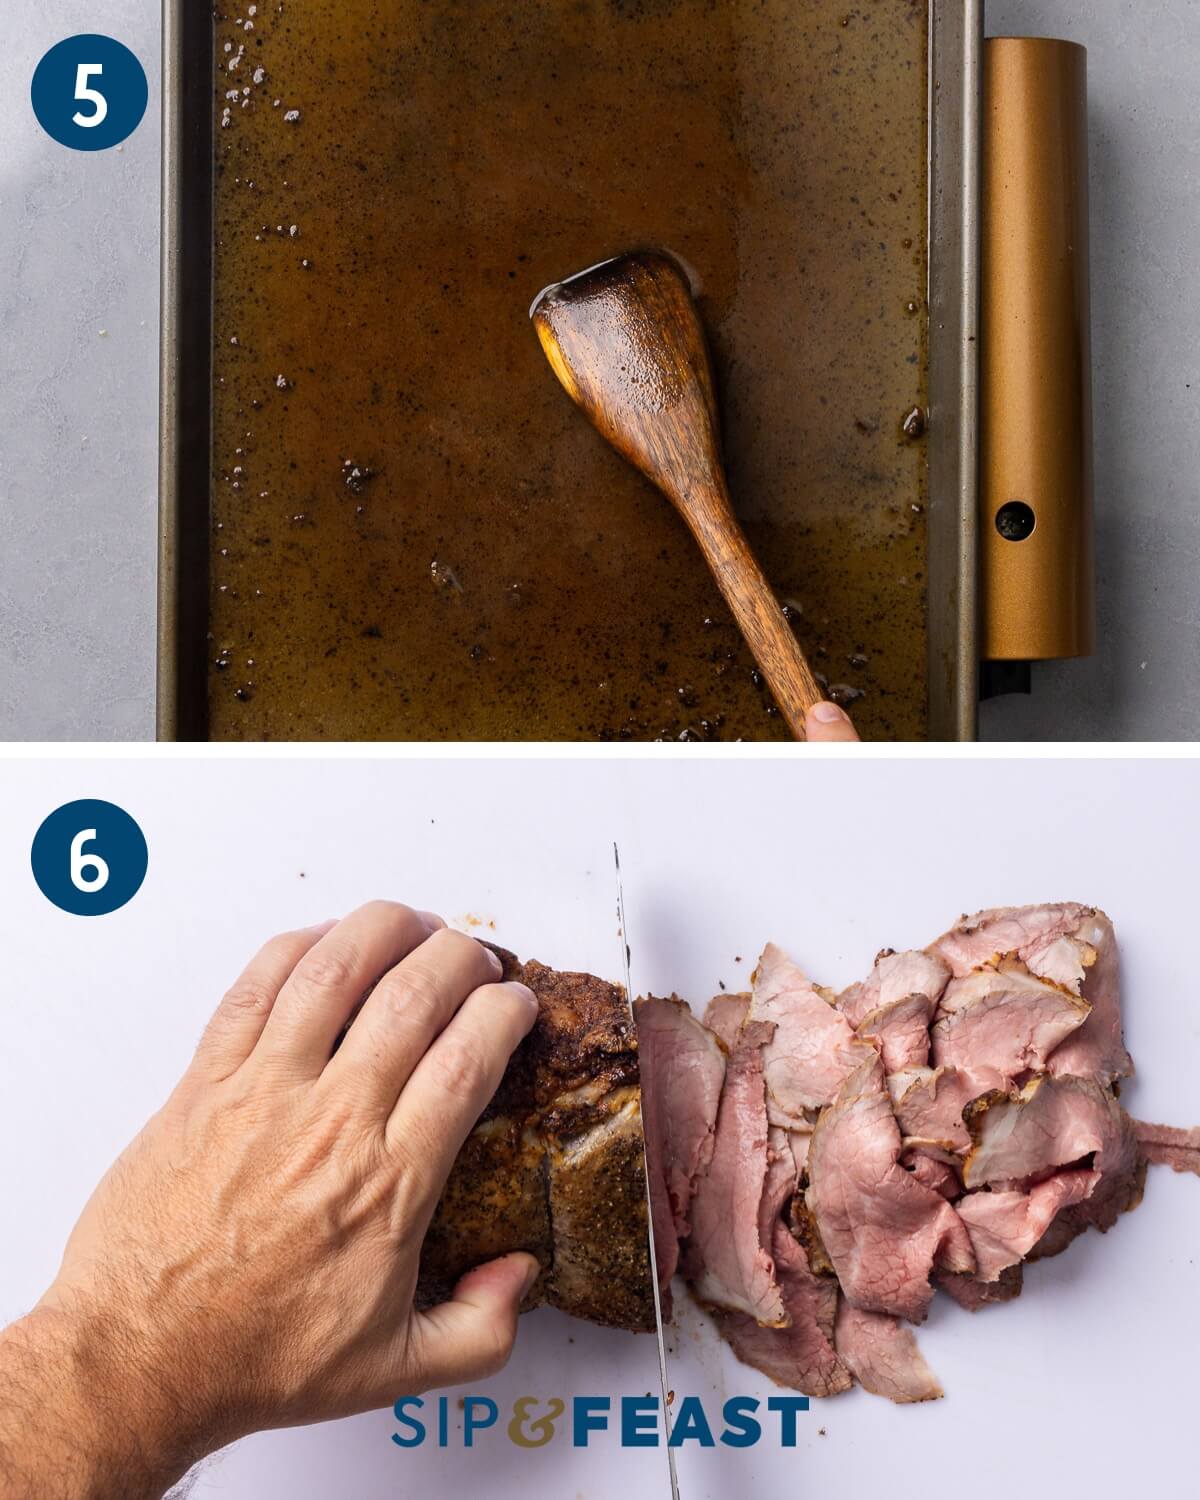
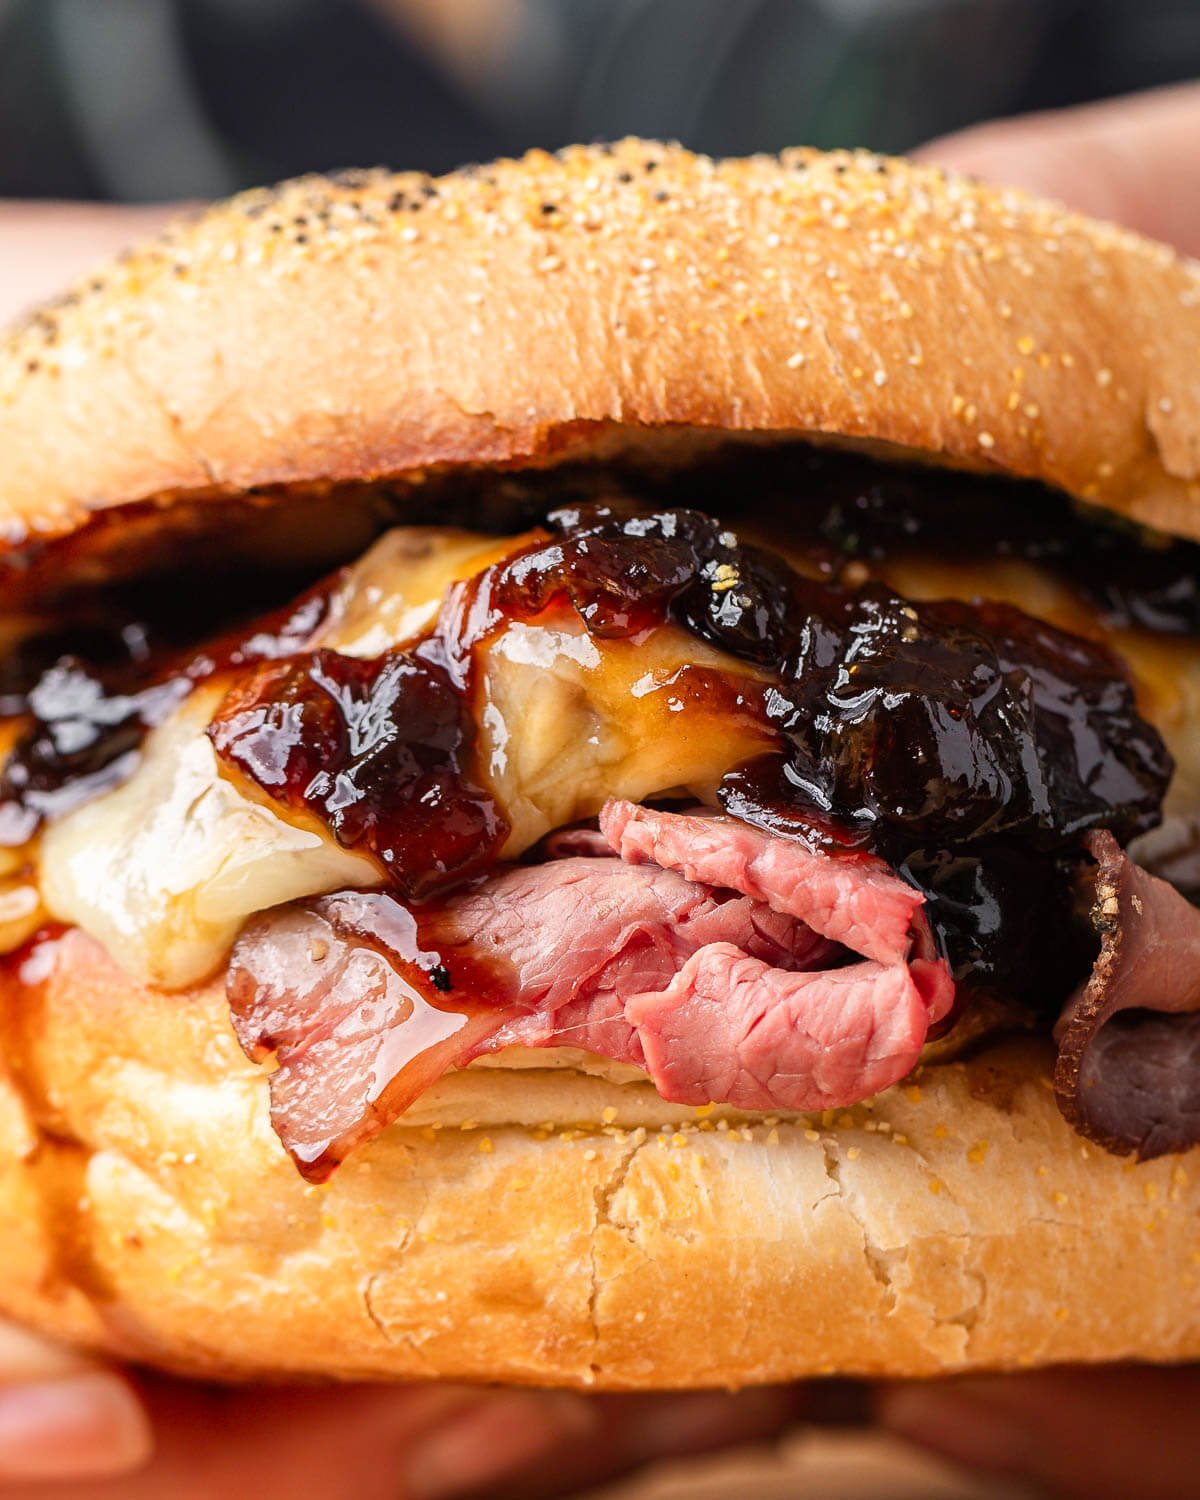
- After the roast beef has cooled in the fridge, remove the plastic wrap, place the roast on a cutting board, and slice using a very sharp knife or meat slicer. Be sure to slice the beef against the grain. Use the roast beef to make your favorite sandwiches such as a hot roast beef sandwich with onion jam, French dip, or a roast beef with horseradish sauce sandwich. Enjoy!

Want To Save This Recipe?
Top tips
- Refrigerate the roast beef! For the best deli roast beef, the roast really needs to be wrapped with plastic and refrigerated for at least 2 hours, but preferably overnight. The roast will reabsorb all of its delicious juices and be much easier to slice when cold.
- Use a slicing knife. A very sharp Chef’s knife works well, but I prefer to use a slicing knife because it is much easier to work with and yields super thin slices.
- Fat cap. Before slicing, you can cut off the top fat cap if you like. Depending on the type of roast and the place it was purchased from, it might not have much of a fat cap to begin with.
- Costco is your friend. I am not sponsored by Costco in any way. I simply find that they have the best deals for meat, such as this eye of round or any other roast you plan to use for roast beef. You can even find a vacuum-sealing machine there that will help keep your roast beef fresher for longer.
More deli recipes
If you’re looking to recreate the deli experience with your roast beef round out the meal with one of these tried and true classic deli sides.
If you’ve enjoyed this Deli Roast Beef Recipe or any recipe on this site, give it a 5-star rating and tell us about it in the comments below.
We strive to satisfy a number of learning styles. If you are someone who prefers to learn by watching, you can find most of our recipes on YouTube and our Facebook Page.
For more never-before-seen FULL MEAL RECIPE VIDEOS, become a Patreon member today!
Deli Roast Beef
Ingredients
- 1 3-pound eye of round roast or top round or rump roast
- 1 1/2 tablespoons (15g) Diamond Crystal Kosher salt
- 1 teaspoon garlic powder
- 1 teaspoon onion powder
- 1 teaspoon black pepper
Want To Save This Recipe?
Instructions
- Remove the roast from the fridge and place it on a wire rack and baking sheet or roasting pan with baking sheet. Season equally on all sides with salt, pepper, garlic and onion powder. Leave the roast out for at least 90 minutes before roasting.
- Preheat the oven to 500f. Make sure the fat cap is facing up. Insert an oven-safe digital thermometer into the center of the roast.
- Pat the roast dry of any water that has wicked to the top of the roast. Place the roast in the oven and cook for 15 minutes then drop the heat to 300f and continue cooking until the center of the roast reaches 110-115f for rare, 125f for medium rare, or 135f for medium. The roast will take another 30-50 more minutes to cook (depending on doneness) after dropping the heat to 300f. Be aware that the roast's internal temp will increase from carry over heat after coming out of the oven.
- Once the roast has finished cooking, move it to another wire rack (that is not warm) to cool for 1 hour.
- After 1 hour of cooling, I recommend wrapping the roast with plastic wrap and refrigerating for at least 2 hours but preferably overnight before slicing. The roast will be far easier to slice when cold and will be perfect for sandwiches. Make sure to slice the roast beef angainst the grain. Enjoy!
Notes
- Eye of round is recommended but top and bottom round (rump roast) all work well.
- For perfect roast beef it’s essential to refrigerate the whole roast after cooking so that it can be more easily sliced. A 12″ slicing knife works well if you take your time.
- Before slicing, you can cut off the top fat cap if you like. Depending on the beef cut and the place it was purchased from, it might not have much of a fat cap to begin with.
- Leftovers can be saved in the fridge for up to 5 days.
Nutrition
Nutrition information is automatically calculated, so should only be used as an approximation.
Follow Me


I’ve been a supporter for a while and have loved every recipe I tried. I haven’t tried this one yet, but if it’s anything like your other deli recipes, it will be a 5!
Having said that, the only other deli item that I miss and haven’t seen a recipe for here —yet— is NY deli rolls. You cannot find them in Texas, where I live. I’ve searched online for a recipe and the closest I’ve come is Barbara’s Kaiser Rolls. They turned out pretty tasty. So now I can have a real deli roast beef sandwich.
I do have a request for another Long Island favorite that I haven’t seen here. Could you please come up with a recipe for egg rolls? The ones I’ve had from Chinese restaurants here tend to be much smaller, greasy, and don’t have the same flavor as I remember. Thanks.
Thanks for the support, Marilyn, and we appreciate the comment. Jim has been working on perfecting his deli roll recipe but won’t put it out until it’s 100% on point, so it’s taking longer than anticipated.
Thanks to this fabulous and easy recipe, I made deli style roast beef that tasted way better than store bought, and at half the cost!
We’re so happy to hear that, Lisa!
This could not have been easier or more delicious!!! Not sure anything else needs to be said. This site never disappoints!
So happy you liked it, Tina!
I’ve always slow cooked a chuck roast but got some sirloin roasts for a deal I couldn’t pass up. Learned to cook them and now top round and the like (which are so much cheaper than chuck these days) are my go to. We get so much mileage out of one roast, starting with the dinner with onion gravy the first night. Thanks for showing me how to cook one!
We’re so happy you enjoyed, Deana!
Just tried this and it is deeeliciouus. Used for a french dip sandwich. Love the show. Being from Alberta Canada where we are extremely fond of our beef this is a real winner.
Great to hear, Merrylyn!
Jim am I missing something? I dont see the video for these recipes on here anymore? Just latest videos?
Hi Judith, whenever there is a video for a recipe it will always be included within the recipe card (the section of the post you get to if you click “jump to recipe”). There is not a video yet for the deli roast beef, however, next Thursday we will put out a YouTube video for the French Dip which will show how to make the deli roast beef. Hope that makes sense. Not every recipe on the website has a video for it, although it’s our goal to get there at some point.
What about the au jus? What are tge ingredients for the meat juice? Thanks.
Hi Jane, if you’re like to make a jus, please refer to our Prime Rib Au Jus recipe here: https://www.sipandfeast.com/prime-rib-au-jus/
This was stupid good. I’ve been lamenting not being able to get good rare roast beef at the deli counter, and now I can make my own! I’m tempted to invest in a meat slicer lol
We’re so happy you enjoyed, Melanie!
Jim and Tara,
Do you think I could reduce the amount of salt without changing the final product significantly?
Hi JJ, you can salt to whatever level you’d like. While the salt is an important ingredient, you can lower it to suit your diet and it will still be good.
I made this a few weeks ago and it came out perfect! Better than deli roast beef! It also freezes well. Thank for another great recipe James!
We’re happy to hear you enjoyed it, Wendy!
Well written receipe and easy to follow. I changed it up to suit my equipment and rubs on hand. Dry brined the meat for about 14 hours, pulled the meat from the fridge and let warm up for 45 minutes. No wicking necessary with the dry brine. Placed in a 500f oven for 7 minutes and reduced temp to 250f for the remainder to lower carry over temperature cook time. Pulled at 120f, refrigerated overnight, and sliced on the meat slicer, perfect! Thank you Jim and Tara!
Hi Rodney, thanks for the comment and so happy you enjoyed! Thanks for sharing your variations as well!
I recently made this roast beef. I initially thought it was too much salt, but it came out perfect! I do have a slicing machine, so it was very easy and seasoned perfectly. I followed the directions exactly! It was great!
We’re so happy you enjoyed it, Rosemary!
I made this on Tuesday, 9.17.24. I wrapped it tightly once it was cool enough and refrigerated it until this morning, 9.19.24. When I sliced it, I gave my hubby the first piece. I asked him if it tasted
Iike deli roast beef and he said, yes. Then I tasted it and it tastes EXACTLY like deli roast beef without any of the additives. The recipe was ridiculously easy to make. When I first moved it to wrap it up, it seemed too salty, but by letting it sit in the fridge, the salty taste had mellowed significantly. I even shared the recipe with a friend. Now she is going to be checking out the website for all the things.
Thank you for showing us how to make this delicious deli meat!!!
This is so great to hear! We’re so happy you and your husband enjoyed it, Janis!
I have not yet made this, so I have no recipe rating. My question is, once cooked and sliced, can the meat be divided and frozen? I’m guessing then it would be defrosted overnight in the fridge.
Thanks for all your great recipes, and the hard work.
Hi LA, yes, you can definitely divide and freeze the meat after it’s cooked and sliced. Hope you enjoy!
Fantastic – thanks for posting this along with your “deli” series.
We’re so happy you enjoyed!
Every time I open a new email from you, it’s like getting a little gift. I’m from Chicago originally and need to make my own Italian Beef’s because there are no Chicago Italian Beef places here in northern CA. In a pinch I also use Boar’s Head Deli beef but often make my own, using almost same seasonings but I do the reverse-sear method. Thanks for all the great recipes!
Thanks for the comment, Mickey, and happy to hear you’re enjoying the emails and recipes!
Perfect recipe!!! Thank you!
We’re so happy you loved it, Sherry!
So easy and so delicious a crowd.Pleas your great for the holidays
Is it a 13 lb roast? That is huge!
No, it’s one 3-pound roast.
Can you tell us about tying the meat before cooking? I’ve cooked roast beef like this before but not used kitchen twine.
Hi Scott, ours came tied so we left it that way, but it does not need to be tied.
This recipe looks fantastic and so easy which I will be making this weekend. Thanks for another rest recipe!
We hope you enjoy it, Pat!