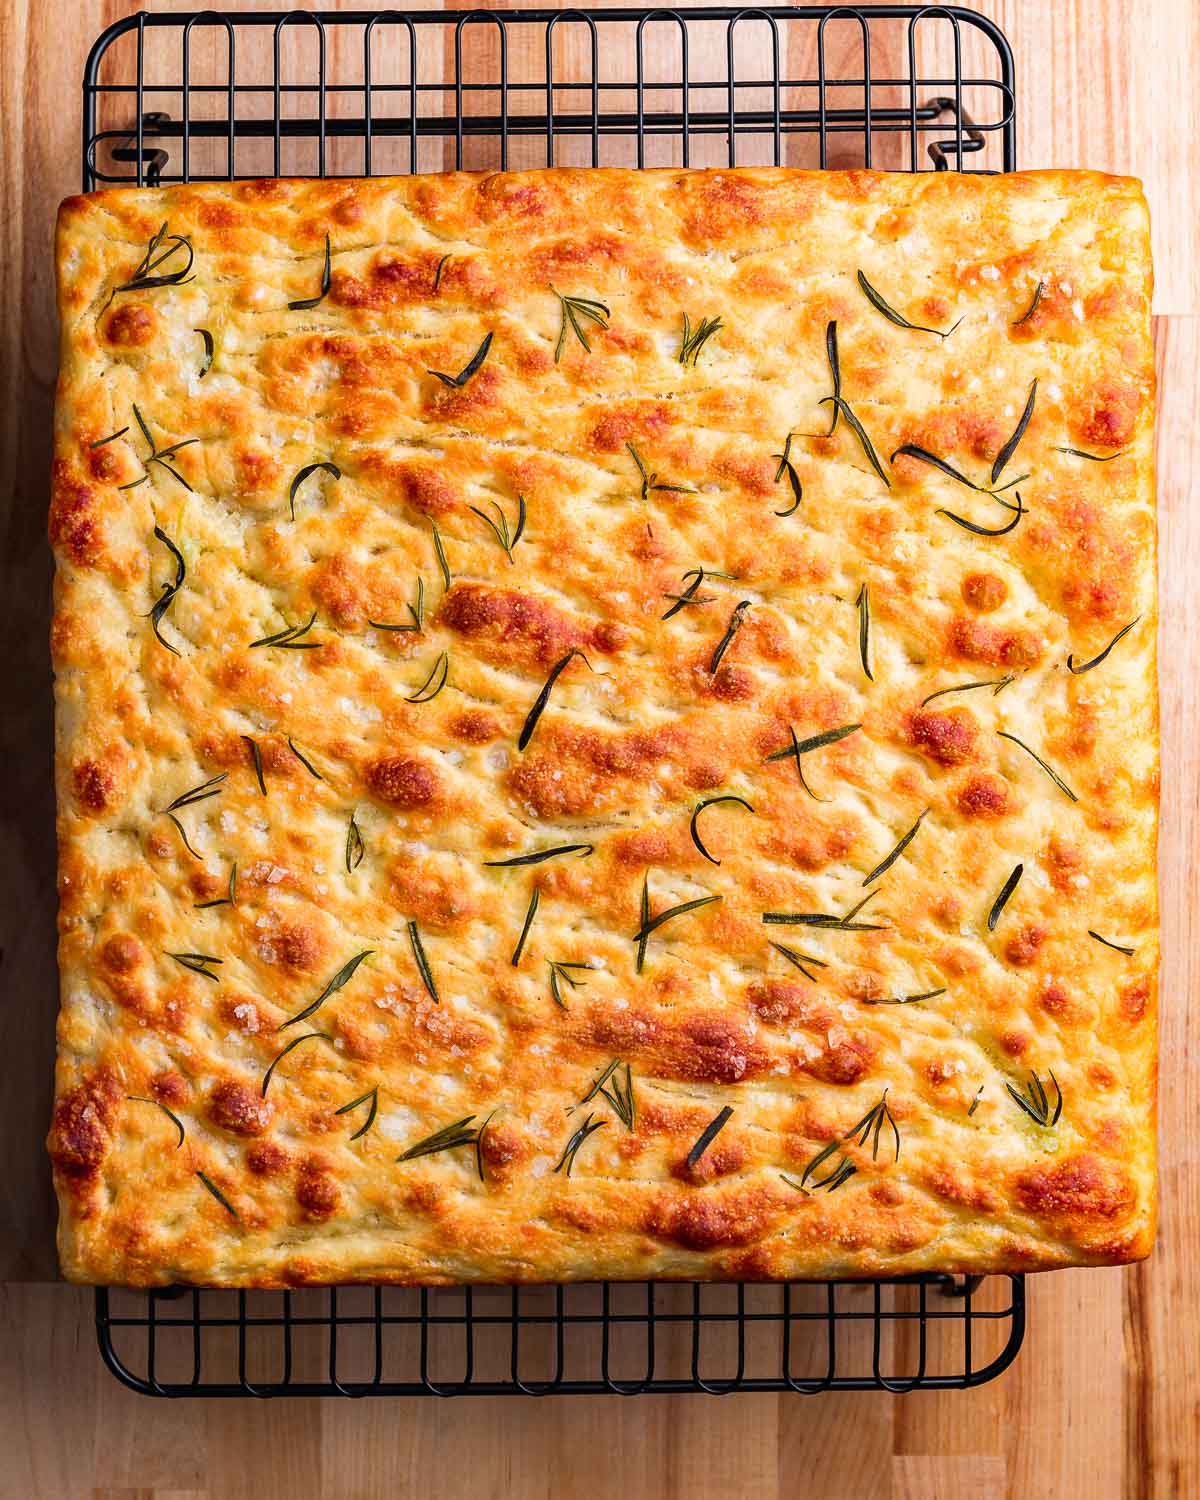
My easy no-knead focaccia has a light and chewy inside with a crisp exterior topped with rosemary and flaky sea salt, but with no kneading required!
This post may contain affiliate links. Our disclosure policy.
No-knead focaccia is the perfect place to start for those who are new to the world of breadmaking but is also great for seasoned breadmakers who want something a little easier!
This easy focaccia is a welcome addition to any antipasto platter but is also great for dipping in soups such as sausage lentil soup and minestrone.
Want To Save This Recipe?
How to make it
Each number corresponds to the numbered written steps below.
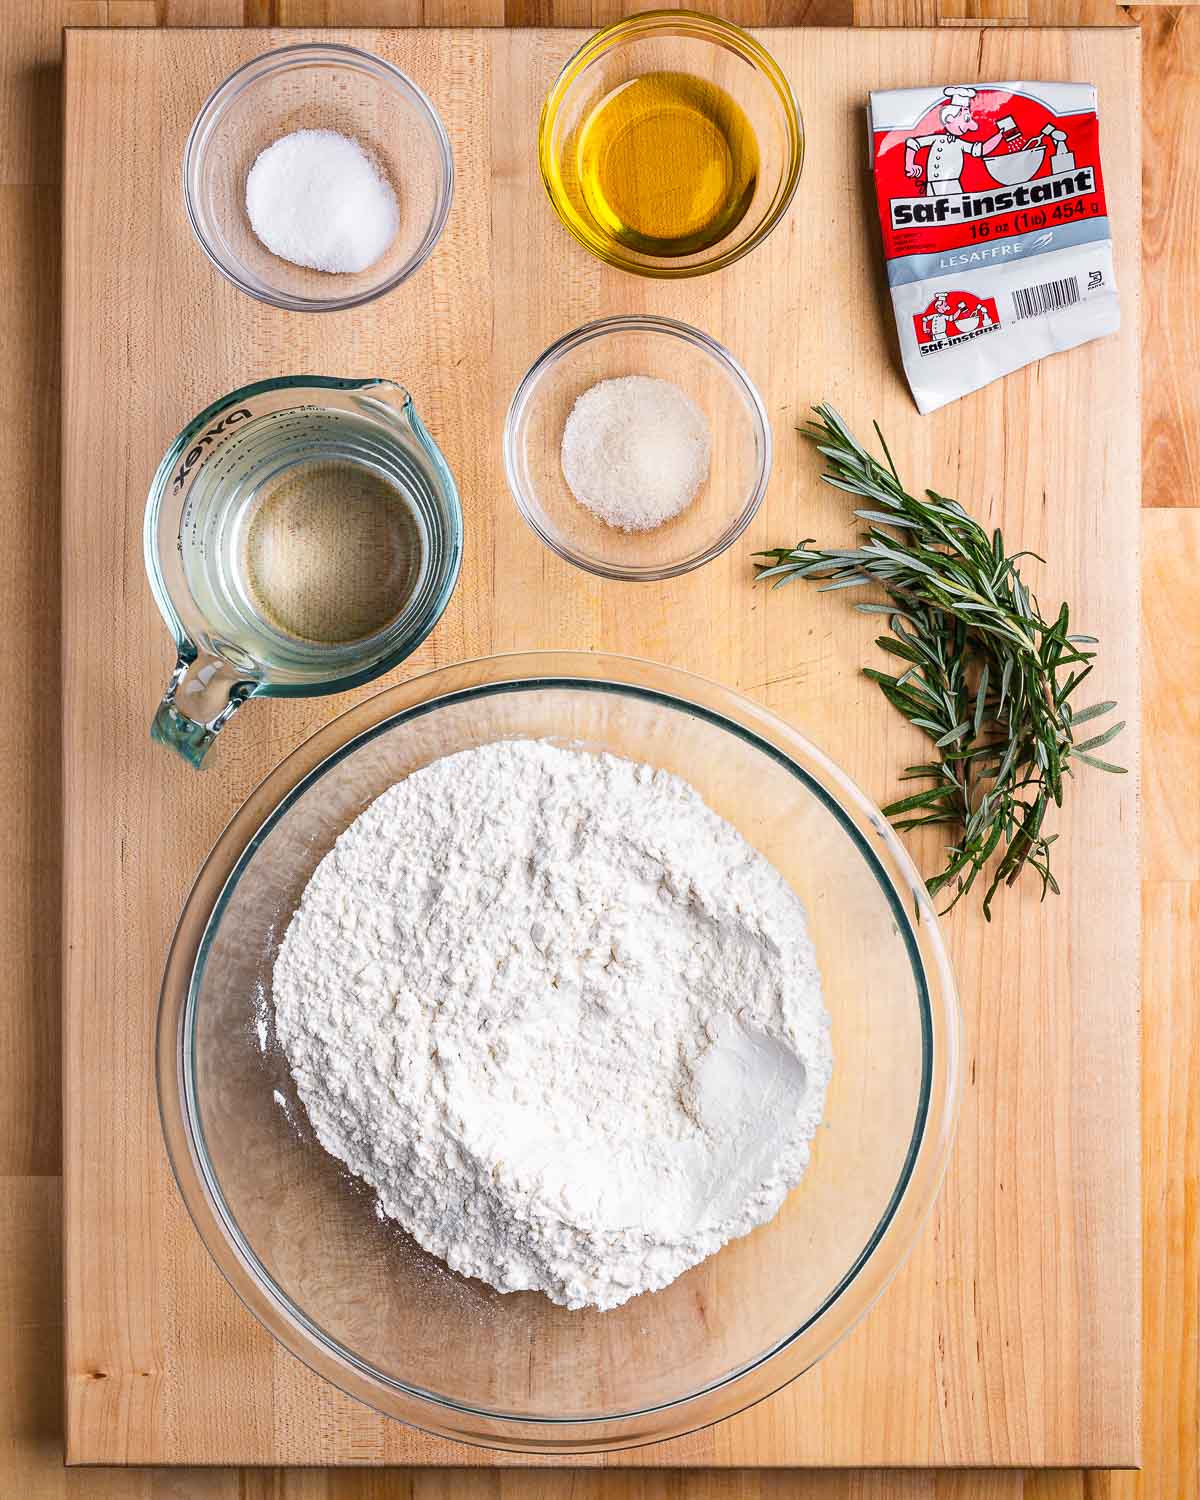
- In a very large glass or plastic bowl, mix together 600 grams (4 3/4 cups) bread flour, 4 grams (1 teaspoon) instant dry yeast, 12 grams (2 teaspoons) fine sea salt, and 7 grams (1 3/4 teaspoons) of sugar. Note: This bowl will be placed in your refrigerator in step 6 so make sure you have room to fit.
- Pour lukewarm water (no hotter than 115f) into a large bowl (large enough to accommodate the rising of the dough).
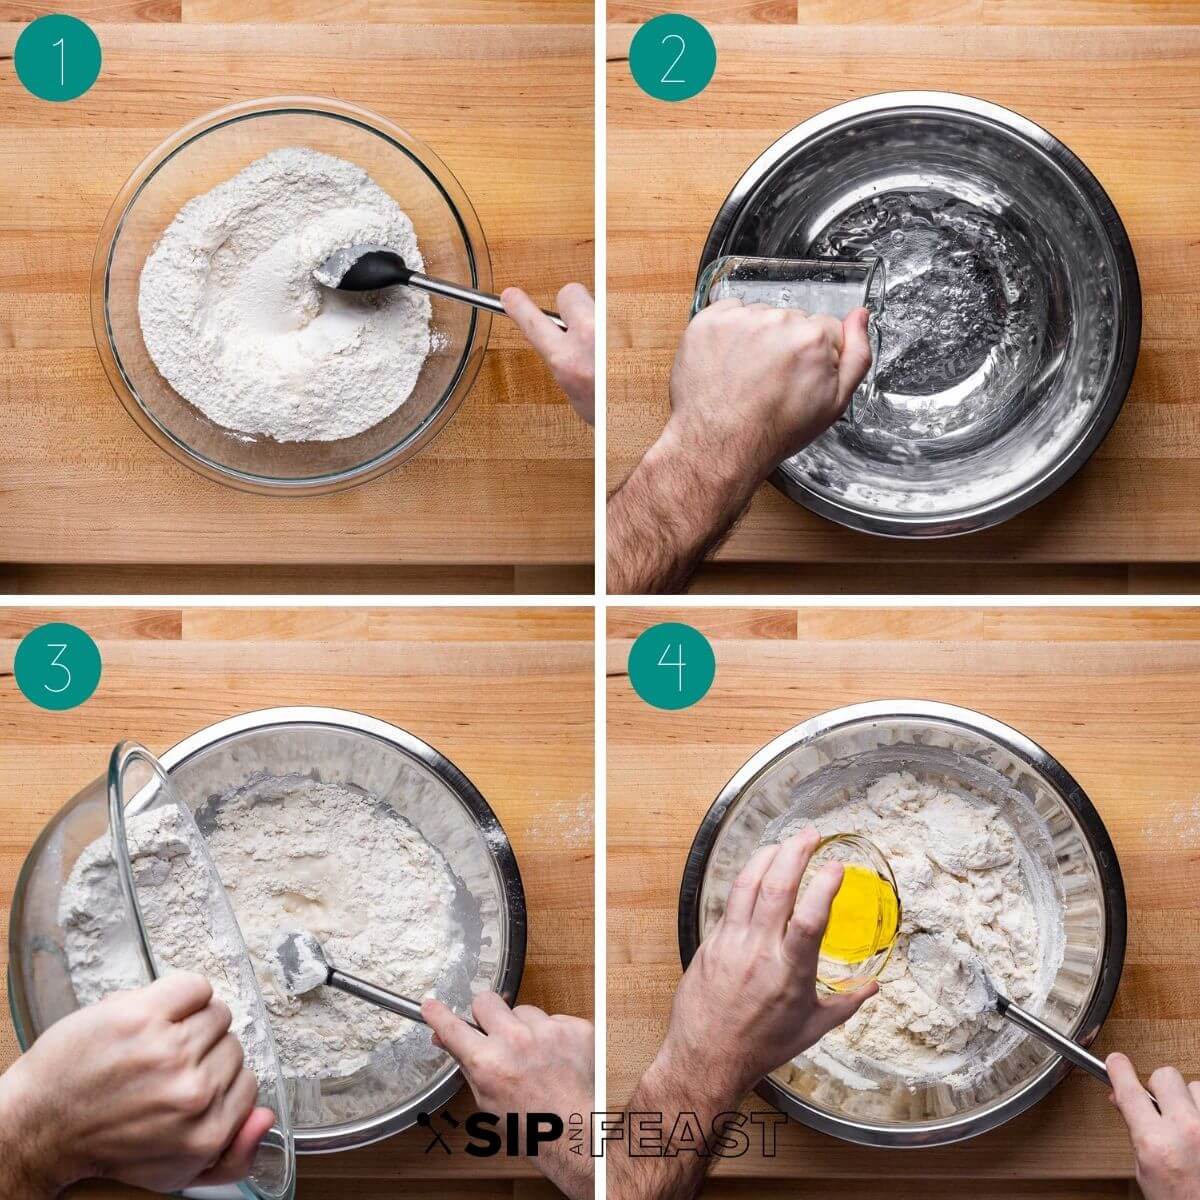
- Slowly add the dry ingredients into the water while stirring. Do your best to thoroughly incorporate the ingredients.
- Drizzle 1 ½ tablespoons of extra virgin olive oil into the bowl as well.
- Stir together with a wooden or silicon spoon as best as you can making sure to incorporate all of the dry flour.
- Place 1 tablespoon of extra virgin olive oil into the first bowl (it should be clean) that had the dry ingredients. Transfer the shaggy dough to that bowl and cover. Leave the dough to sit for 2 hours covered, on top of a warm oven, refrigerator, or window sill then refrigerate the covered dough overnight.
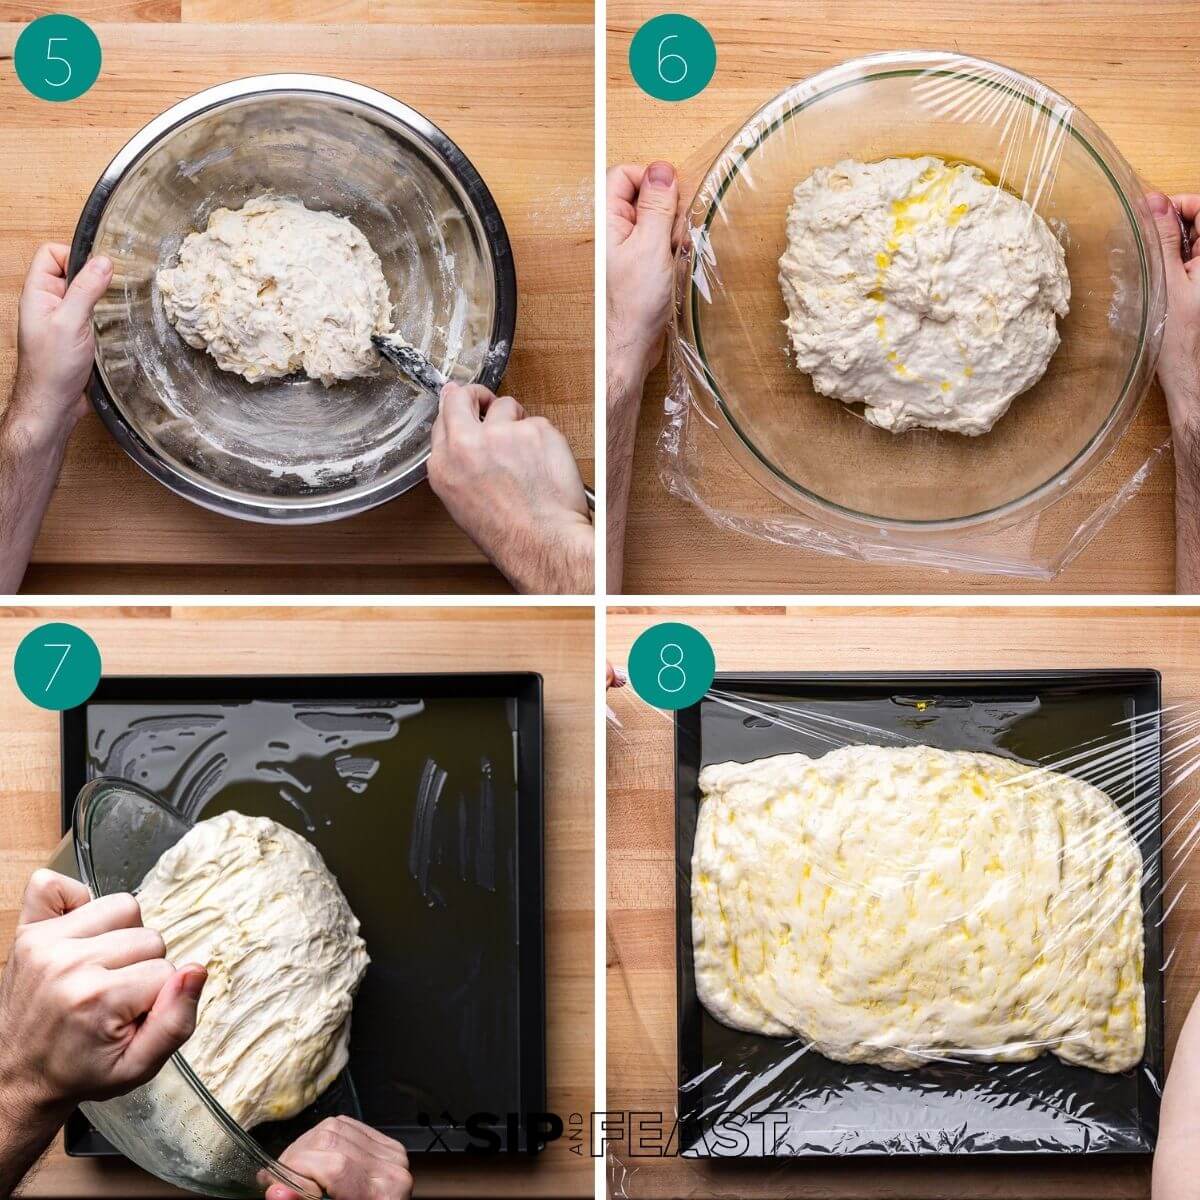
- The next day it is time to prepare the pan for the no knead focaccia. Pour 3 tablespoons of extra virgin olive oil into a 14 by 14″ square pan or a rectangular pan. Spread it around with a paper towel then place the dough into the pan. Pour 2 more tablespoons of extra virgin olive oil onto the top of the dough.
- Using your fingers, press the dough into the corners. The dough will most likely not fit the pan and will spring back. Just cover the pan tightly with plastic wrap and wait 45 minutes before returning to stretching.
- After 45 minutes again stretch the dough by pressing into the corners (it will stretch far more easily now) and then cover one more time and let it rise in a sunny window or on top of a warm oven or refrigerator for 3-4 hours or until the dough has risen substantially and completely filled the pan.
- In pic 10 you can see how much the dough has risen after about 4 hours. At this time preheat the oven to 450f and set one rack to the lowest level and the other one to the middle of the oven.
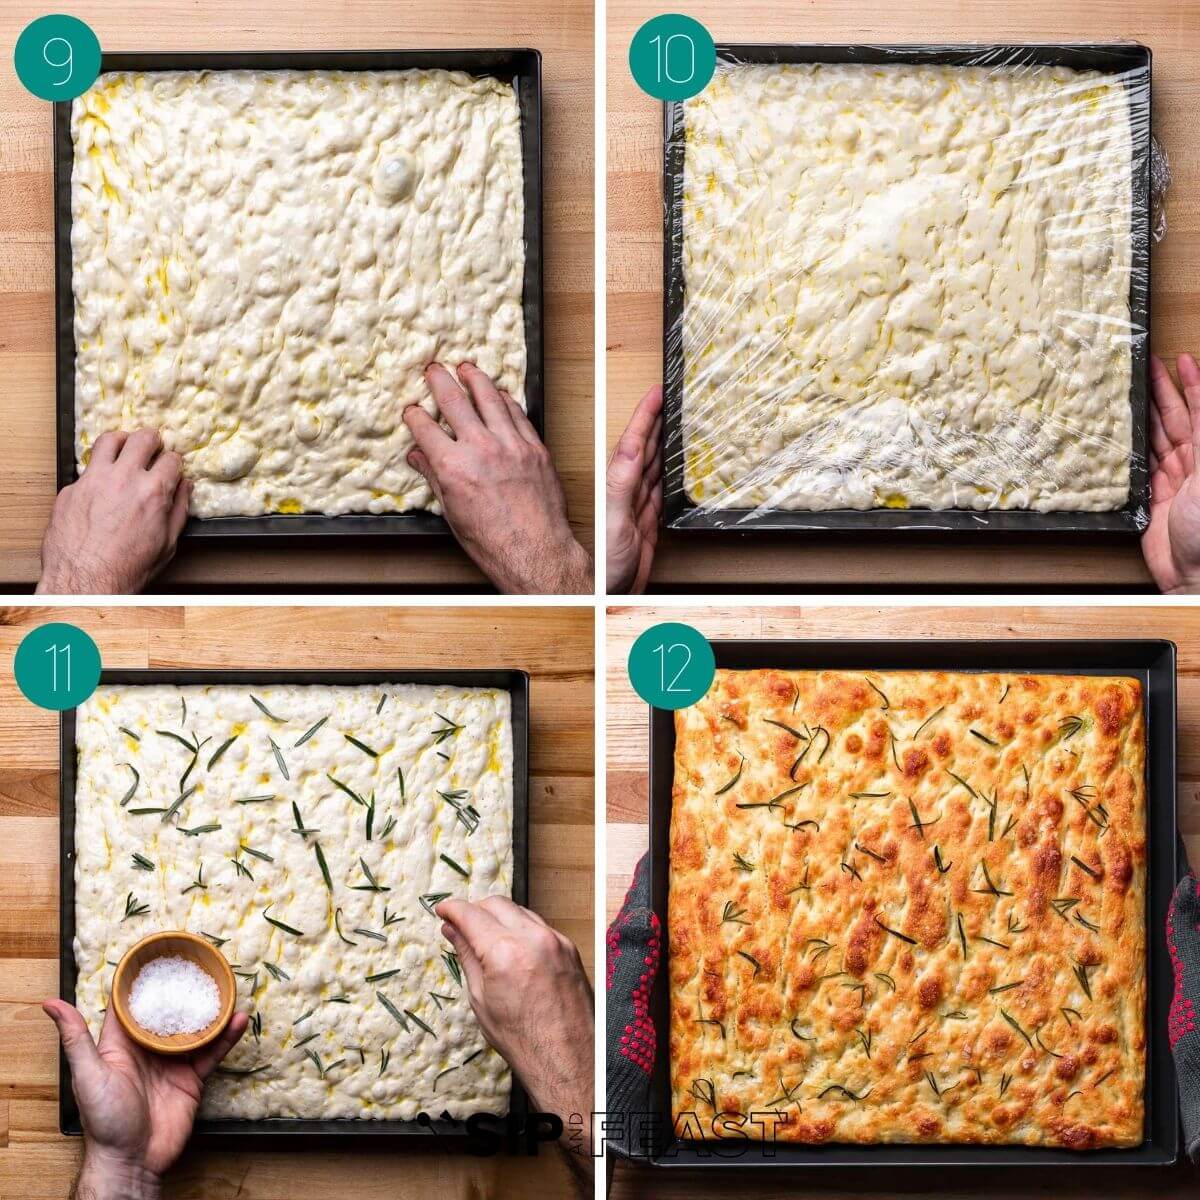
- Before baking, uncover and press the dough gently with your fingers (you can 100% skip this process – I often do!) to make the characteristic focaccia holes. Sprinkle with rosemary and flaky sea salt.
- Bake the focaccia on the oven’s lowest level for 10-12 minutes or until golden. Once golden, (you can check this by quickly removing the pan from the oven and taking a peek with a spatula) place the pan on the middle rack and continue to bake for another 15 minutes or until well browned on top. Total cooking time should be around 25-28 minutes, but all ovens are different. If the no knead focaccia looks finished a little early by all means remove it from the oven. Conversely, it could possibly need a few more minutes.
Top tips
- Salt and yeast. This recipe uses SAF instant dry yeast which is why it’s added along with the dry ingredients including salt instead of separately with the water. Many pizzerias use this product for its superior convenience. You don’t need to worry about salt degrading the yeast with this type of yeast no do you have to mix the yeast with water prior to adding the dry ingredients.
- Patience yields taste. You will likely see other recipes for focaccia that say you can make the focaccia after 4-6 hours. While that is true, I personally recommend letting this sit in the refrigerator for at least 18 hours. If you can go longer – even up to 2-3 days – even better. The cold fermentation process is what gives this focaccia a much better flavor and unless using more advanced bread-making techniques, putting the dough in the fridge overnight is your best bet to an easy flavorful no knead focaccia.
- Toppings. I love a classic focaccia that is topped with rosemary and flaky sea salt and those are what I used for this recipe. You can certainly deviate from this and put your own spin on this. Toppings can include olives, sliced bell peppers, sliced tomatoes, red onion, and fresh herbs such as chives, thyme, or oregano. If you’re feeling really artsy you can create designs using a combination of these items like I did with my daughter in our Mother’s Day focaccia YouTube video.

More great recipes
While this no-knead focaccia is the easiest of my dough recipes, my step-by-step instructions make these more complex dough recipes foolproof and easy to follow.
No Knead Focaccia
Ingredients
For the dough
- 600 grams bread flour or 4 3/4 cups
- 480 grams lukewarm water (not over 115f) or 17 ounces
- 4 grams instant yeast or 1 teaspoon
- 12 grams fine sea salt or 2 teaspoons
- 33 grams extra virgin olive oil divided, or 2 1/2 tablespoons
- 7 grams sugar or 1 3/4 teaspoons
For the focaccia
- 5 tablespoons extra virgin olive oil divided
- 1 tablespoon rosemary
- 1 1/2 teaspoons flaky sea salt or coarse sea or kosher salt
Want To Save This Recipe?
Instructions
For the dough
- Mix the dough's dry ingredients together in a very large bowl. Pour water into a second large bowl (large enough to accommodate the rising of the dough). Slowly add the dry ingredients into the water while stirring. Drizzle 1 1/2 tablespoons of olive oil into the bowl as well. Stir together with a wooden spoon as best as you can making sure to incorporate all of the dry flour.
- Pour the remaining olive oil into the first large bowl (should be clean) and spread it around. Place the dough into that oiled bowl and cover tightly. Leave the dough to sit for 2 hours to rise.
- After 2 hours, refrigerate the dough for at least 18 hours or even better 2-3 days.
Making the focaccia
- Pour 3 tablespoons of extra virgin olive oil into a 14 by 14" square or rectangular pan. Spread it around with a paper towel then place the dough into the pan. Pour remaining oil onto the top of the dough.
- Using your fingers, press the dough into the corners. The dough will most likely not fit the pan and will spring back. Just cover the pan tightly with plastic wrap and wait 45 minutes before returning to stretching. Stretch the dough again and then cover one more time and let it rise in a sunny window for 3-4 hours or until the dough has risen substantially and completely filled the pan.
- Preheat oven to 450f and set one rack to the lowest level and another to the middle level.
- Before baking, uncover and press the dough gently with your fingers (you can also skip this process) to make the characteristic focaccia holes. Sprinkle with rosemary and flaky sea salt.
- Bake the focaccia on the oven's lowest level for 10-12 minutes or until golden. Once golden place the pan on the middle rack and continue to bake for another 15 minutes or until well browned on top. Remove from oven and with 2 spatulas move focaccia from the pan to a wire rack. Let rest for 10 minutes before cutting and eating. Enjoy!
Notes
- The dough can be cold fermented (placed in refrigerator) for up to 3 days with even better results.
- Cooking time will vary depending on the exact oven temp. After 10-12 minutes of cooking on the lowest rack, the focaccia should be golden and crisp. If it’s completely blond the focaccia can be cooked longer on the bottom but watch carefully. Once it’s golden the focaccia needs to be moved to the middle rack to avoid burning.
- Leftovers can be saved for up to 3 days and can be reheated at 350f on a parchment paper-lined baking sheet until hot. About 10 minutes.
Nutrition
Nutrition information is automatically calculated, so should only be used as an approximation.
Follow Me
If you’ve enjoyed this No-Knead Focaccia Bread recipe, give it a 5-star rating.
Watch us on YouTube, follow along on our Facebook Page, and become a Patreon member to receive access to exclusive full-meal videos and content.


Another winning recipe. I made it to serve with your short rib ragu (yum!). Let it ferment in the fridge for 3 days, and added some caramelized onion. Everyone loved it.
We’re so happy you enjoyed, Stephen!
Hi Jim and Tara,
I only have Fleischmann’s Rapid Rise and also Active Dry yeast. Can I use this yeast instead of the yeast you use?
And if I do use my yeast, will it be a problem combining it with the salt?
I don’t have sea salt so I will be using Kosher salt.
Thank you and Merry Christmas!
You can use the active dry yeast and the salt should not be a problem.
If you don’t have a 14×14 pan what size rectangular pan would you use?
Hi Charlene, you can use a standard half sheet pan (approx 13×18) and allow the dough to proof a little longer to help fill out the additional space. Jim will often use different size pans for this and it works well for each one.
Everyone has a carb vice and bread is mine! This did not disappoint as it was easy, scrumptious and totally fun to make! When you’re little and helping your mom bake cookies, you’re told to not play with the dough, well not this time!! So so good and it was the perfect accompaniment to our soup. Thank you Jim!
Hi Linda, so happy you enjoyed this one and really appreciate the comment!
Jim, I was really excited that I was actually making a bread. Lol! My guy is not crazy about rosemary so I just added everything bagel It has salt but it could have used more. I read somewhere that you can put your dough in oven with light on vs warm stove, window, etc. what do you think about that? It was very good. Had nice crunch to it. I will definitely make it again. Thanks for the great instructions👍👍
Thanks so much, Deb! I’m so happy you enjoyed this and that you made it your own with the everything bagel seasoning! Yes, you can definitely use the light in the oven to help with the dough.
Thanks! Will try the light in oven method next time as the other options are a challenge in my small kitchen!
This sounds fabulous! I will be making this for sure! Thanks so much!
Thanks, Marina! Hope you enjoy it.