
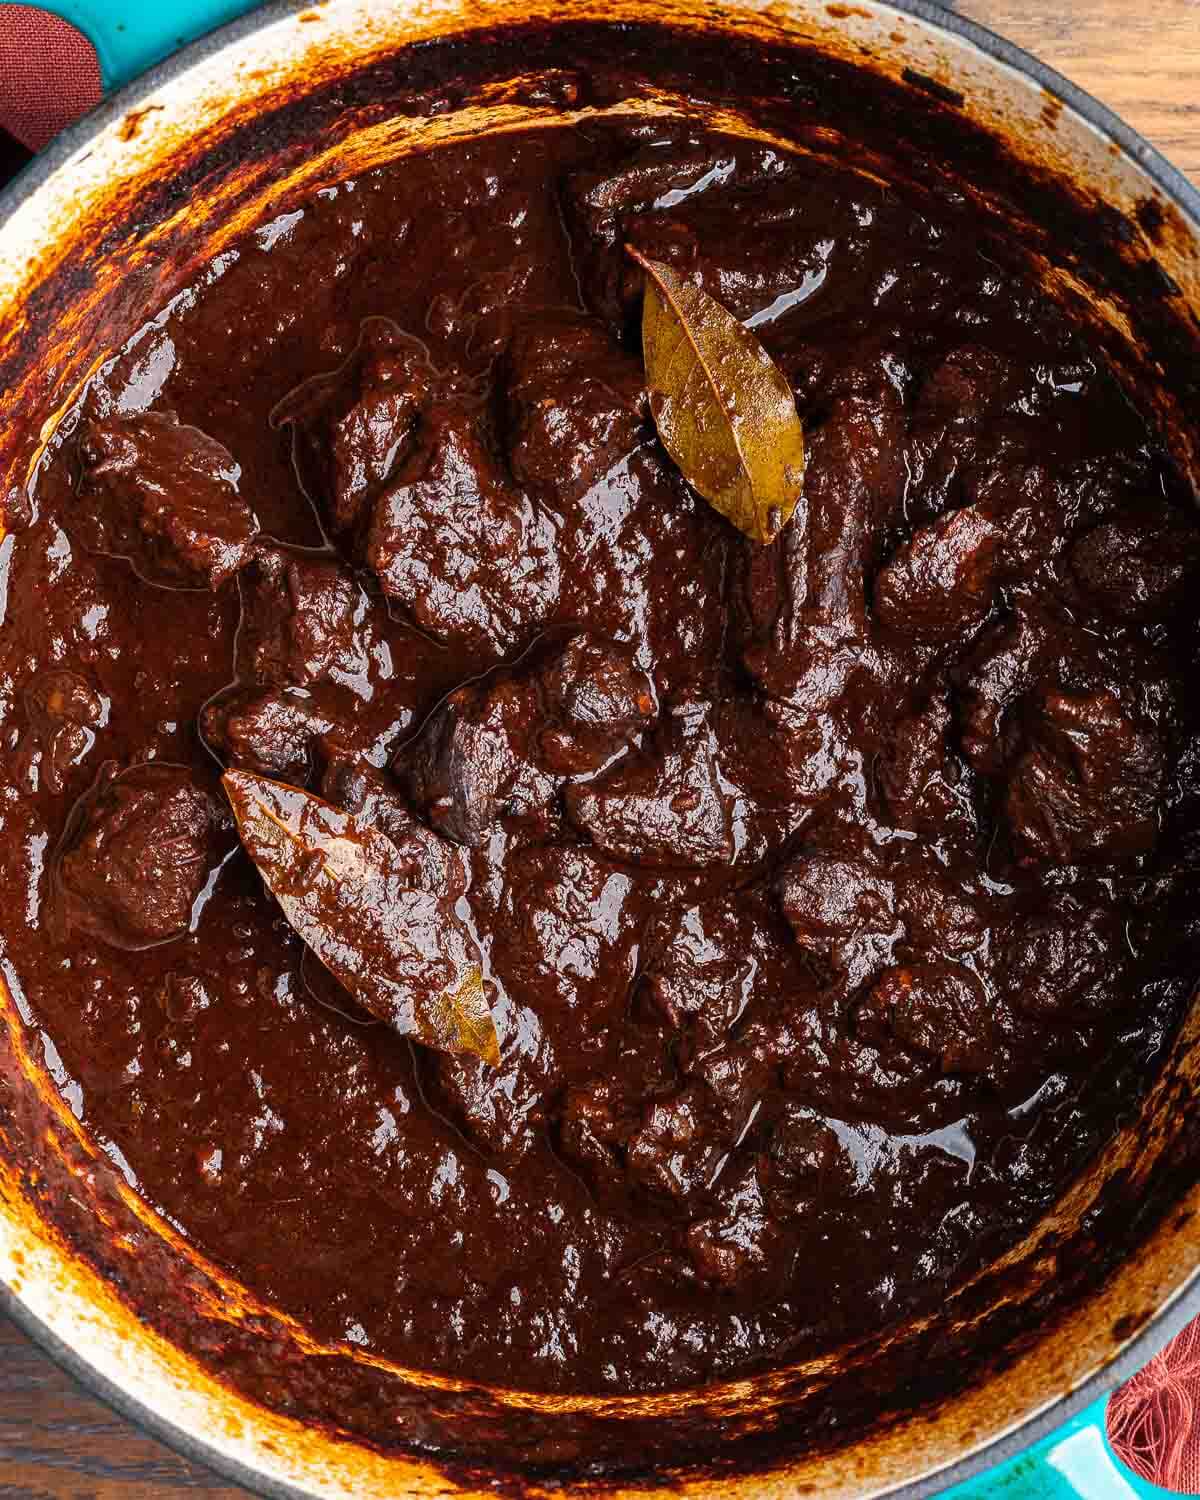
Deep, smoky, and incredibly delicious, Chili Colorado is a dish made with chunks of beef braised until tender in a red chili sauce. It’s easy to make and best served with rice and flour tortillas.

This post may contain affiliate links. Our disclosure policy.
Chili Colorado gets its name not from the state of Colorado, but from the Spanish word, colorado, which means “colored-red”, or “reddish in color”.
It’s a Mexican stew that’s rich in flavor thanks to dried red chiles, guajillo, ancho, and pasilla.
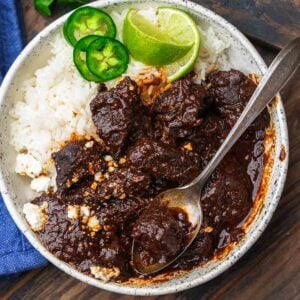
Chili Colorado is traditionally served with Mexican rice and fresh flour tortillas, and I enjoy topping mine with a touch of cotija cheese, jalapeños (for heat since this is a mild chili), lime wedges, and a cucumber jalapeno margarita.
While this red chili is excellent any night of the week, it’s a huge hit for game-day and Super Bowl gatherings along with guacamole, Buffalo wings, and spinach artichoke dip!
Recipe Ingredients
All ingredients for this recipe are shown in the pic below and special notes are made in this bulleted list to assist you.
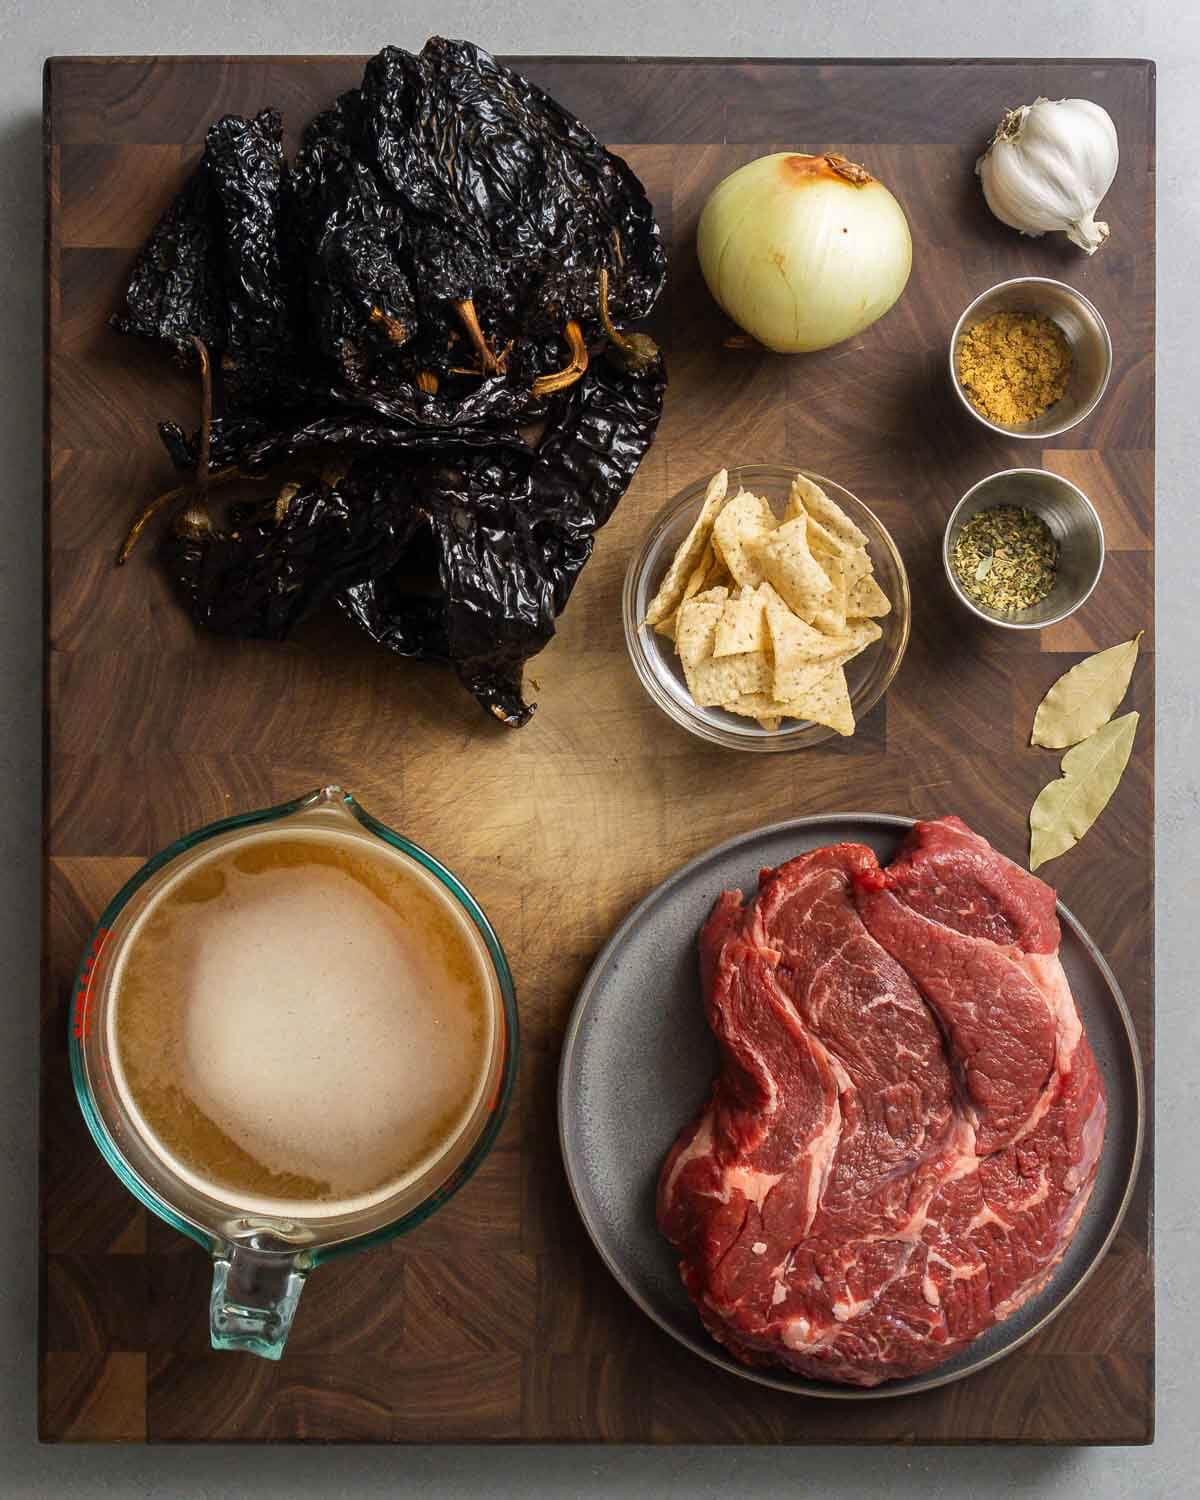
- Dried red chiles. I used a combination of ancho, pasilla, and guajillo. While you can use chili powder as a substitute, I don’t recommend doing so. The rich flavor in chili colorado comes from these incredible dried chiles. You can find them on Amazon, and a bag will last you a while. You can also use them to make my turkey chili and classic beef chili.
- Chuck roast. You can buy pre-cut chuck roast but I prefer to buy an entire roast and cube it myself. Costco has great prices on chuck if you have one nearby.
- Lard. Traditional chili colorado would be made with lard but you can also use a neutral oil, such as avocado oil.
- Beef stock. Use homemade beef stock if you have it, or make a stock from low-sodium beef base.
- Herbs. If you can find it, use Mexican oregano, or you can sub with dried Sicilian oregano. I also use ground cumin and 2 large bay leaves.
- Tortilla chips. Crushed tortilla chips are used for thickening the chili and are optional.
See the recipe card for full information on ingredients and quantities.
How to make it
Each number corresponds to the numbered written steps below.
- Remove the stems and seeds from 6 dried ancho chiles, 5 dried pasilla chiles, and 3 dried guajillo chiles. (Photo #1)
- Toast the chiles in a dry pan over medium heat for 30 seconds per side, or until very fragrant. (Photo #2)
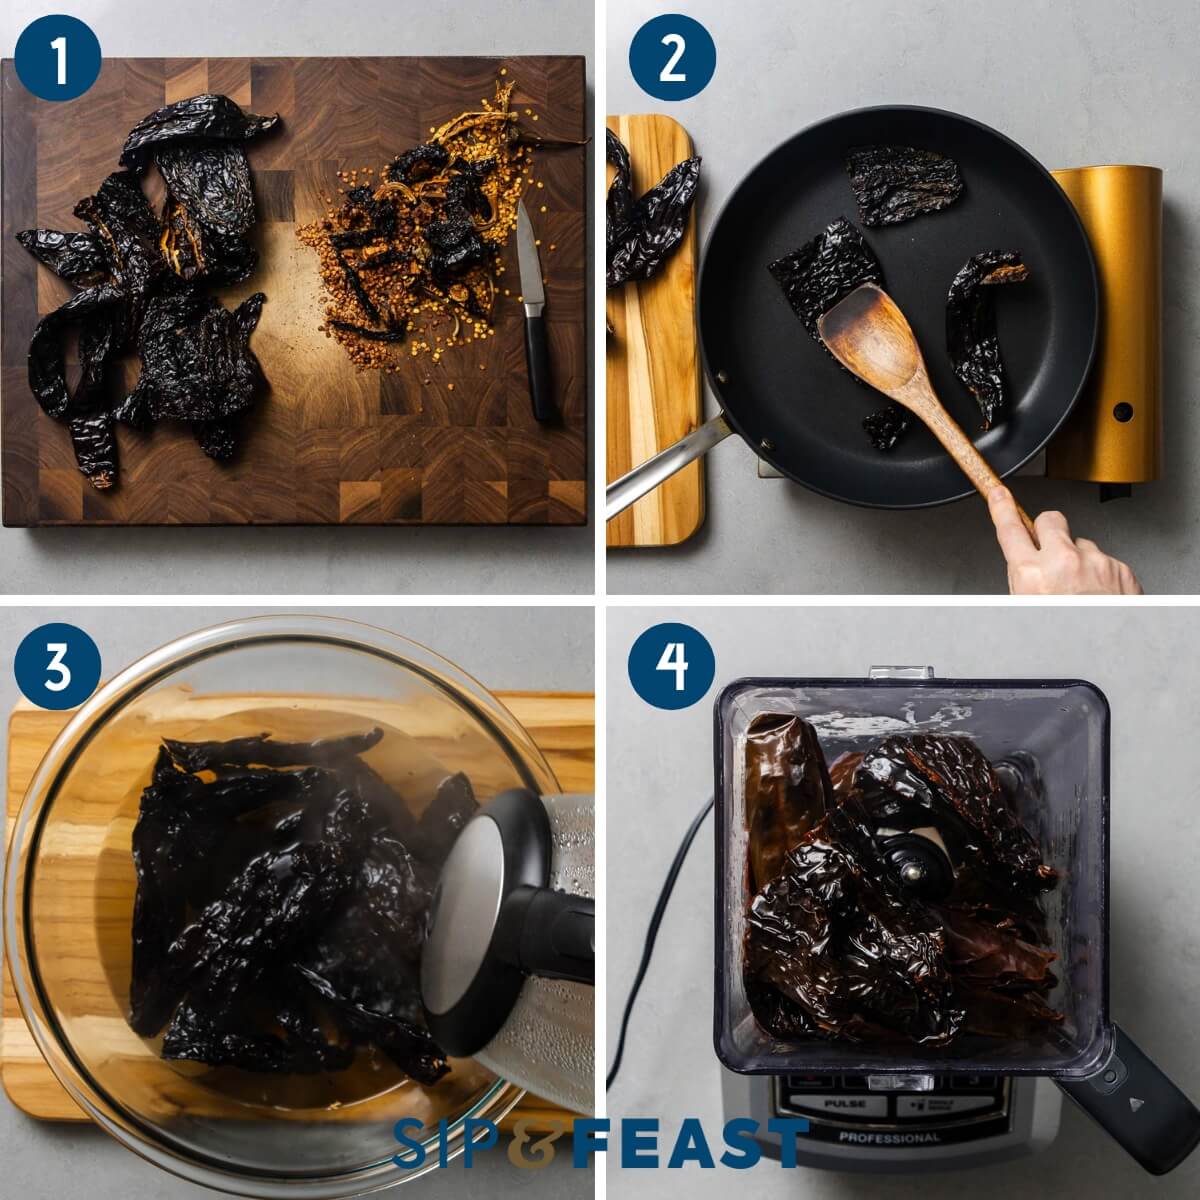
- Place the chiles in a large bowl and cover them with hot water, then cover the bowl in plastic wrap and allow the chiles to soften for at least 20 minutes. (Photo #3)
- Once the chiles are soft, add them to a blender along with 1 cup of new1 cup of new water (not the chile soaking water) water and blend until smooth and set aside. (Photo #4)
- Preheat the oven to 300f and set the rack to the middle level. Diced 1 large yellow onion and mince 5 cloves of garlic and set aside. Cut a 3-pound chuck roast into 1-inch cubes, pat them dry, and season with salt and pepper. Note: large pieces of fat should be removed and either saved for another purpose or discarded. (Photo #5)
- Heat a large Dutch oven to medium heat along with 4 tablespoons of lard. Sear the beef on all sides working in batches to not overcrowd the pan, then remove the beef to a plate and set aside. (Photo #6)
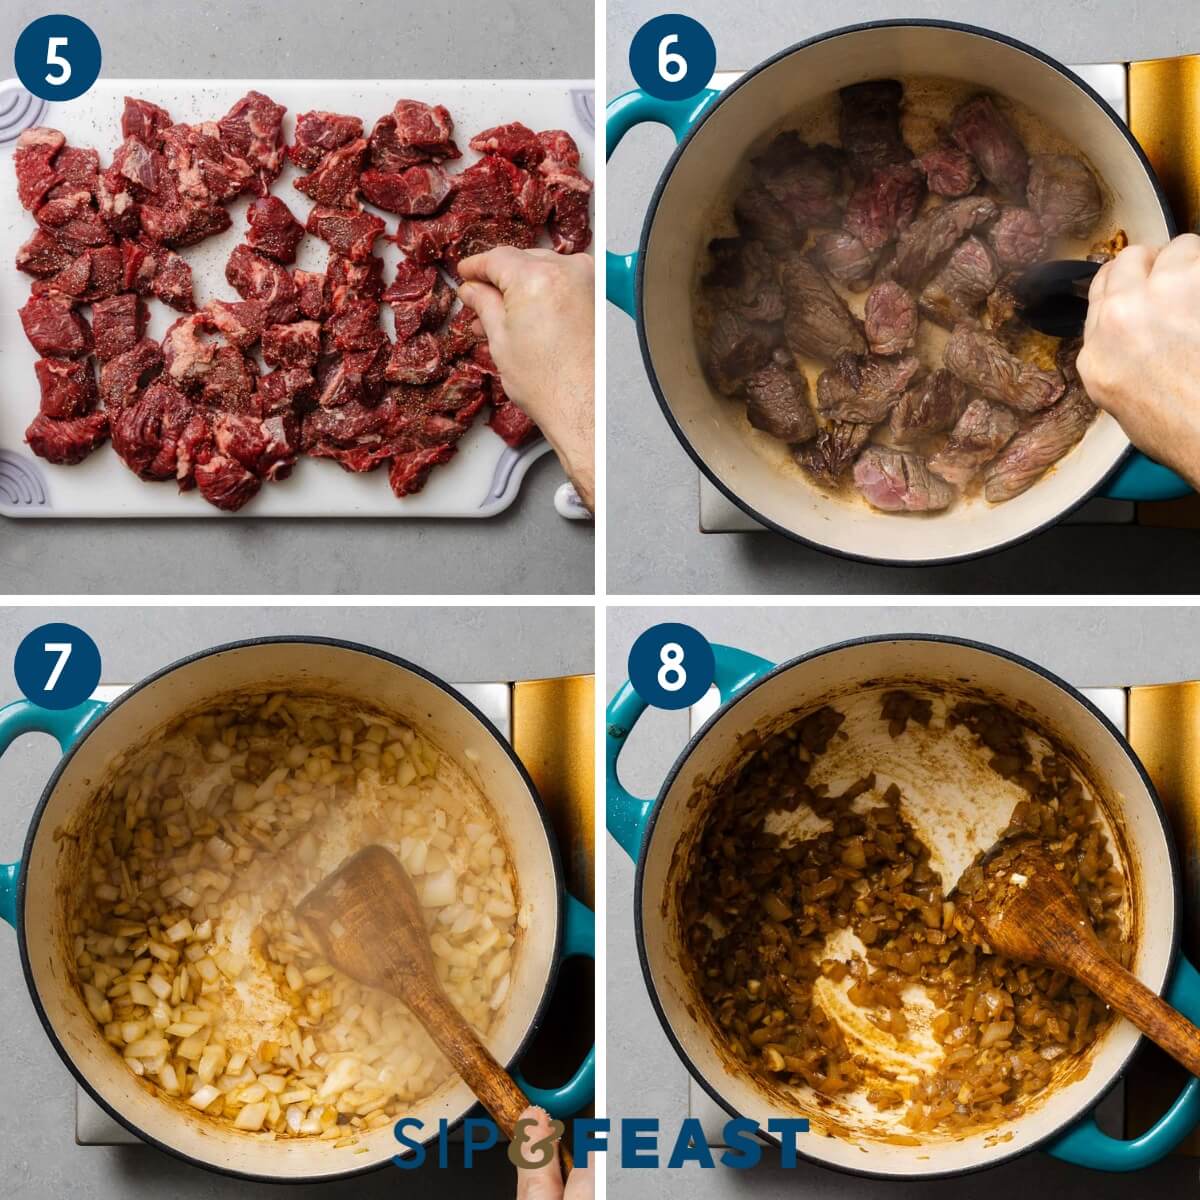
- Add the onions to the pot and cook for 7-8 minutes, or until soft. (Photo #7)
- Add the garlic along with 2 teaspoons of ground cumin and cook for 2 minutes or until fragrant. (Photo #8)
- Add the chile sauce to the pot and cook for another 3 minutes while stirring frequently. (Photo #9)
- Add the beef cubes back to the pot along with 2 teaspoons of Mexican oregano, 2 bay leaves, and 3 cups of low-sodium or homemade beef stock and bring to a boil. (Photo #10)
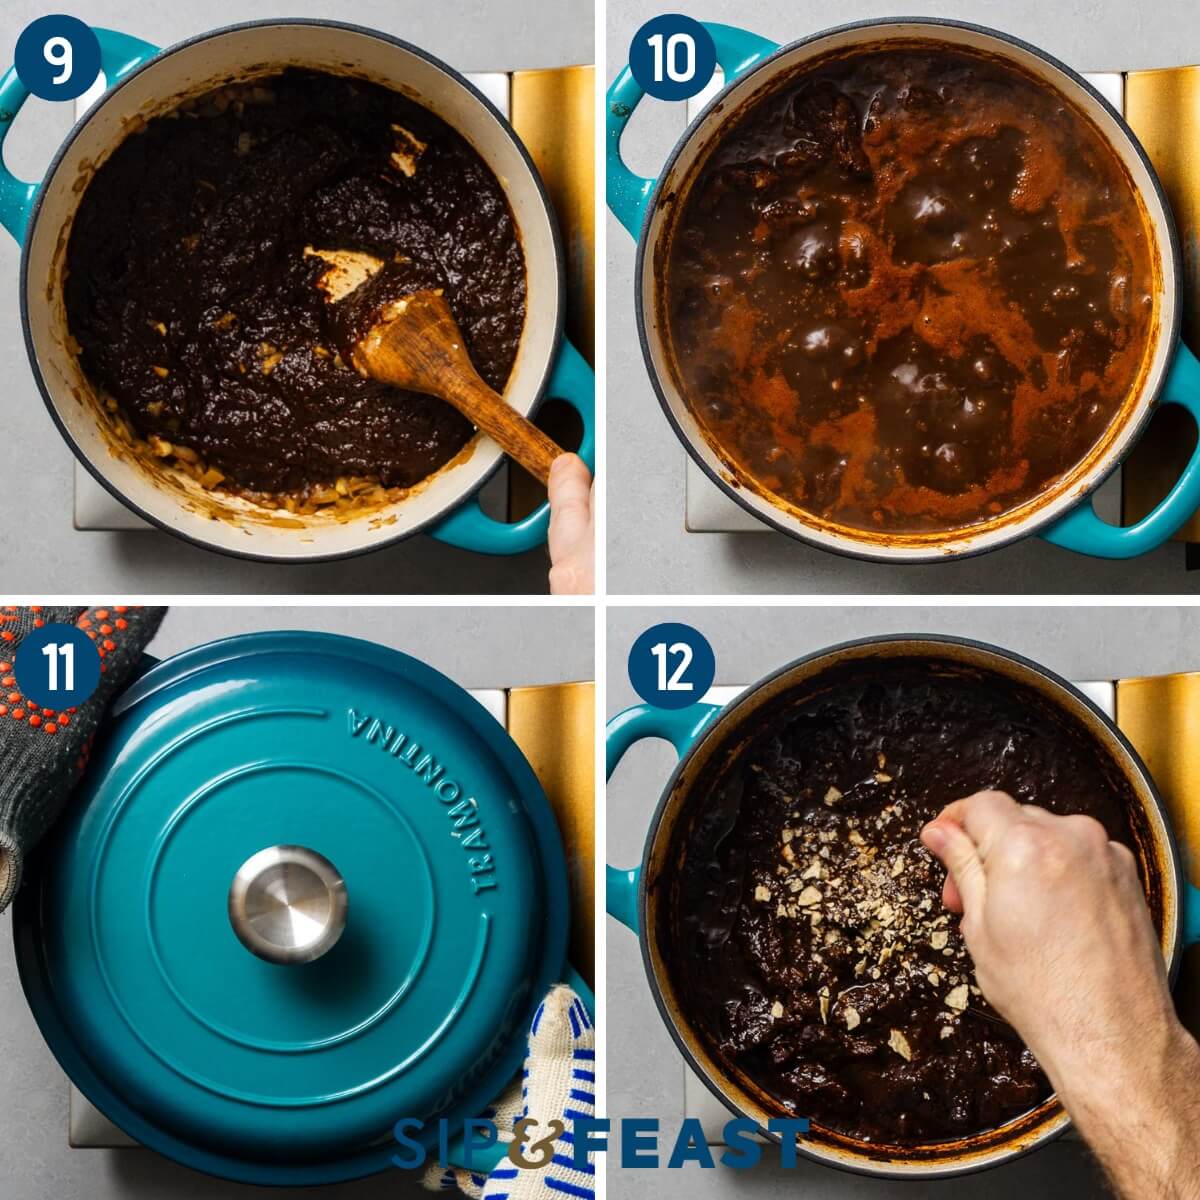
- Once boiling, turn off the heat and cover with the lid and move the pot to the oven and cook for 90 minutes, then remove the lid and cook for another 30-45 minutes or until the chili has thickened. (Photo #11)
- Remove the pot from the oven and if the chili hasn’t thickened enough, add 1/4 cup of crushed tortilla chips and cook on the stove over medium-high heat stirring frequently until thickened to your liking. Taste test and adjust salt and pepper as needed. If the chili is too bitter, add 1-2 teaspoons of agave nectar or honey to balance it out. Serve in bowls with Mexican rice, jalapeño slices, cotija, diced raw onion, sour cream, and any of your other favorite chili toppings. (Photo #12)
Top tips
- Make ahead. As with all soups, stews, and chilis, red chili colorado will be better when made ahead of time. It gives the flavors time to fuse and meld together.
- Chile sauce. Similar to making the entire chili ahead of time, you can further intensify the flavor by making the red chile sauce ahead of time and storing in the fridge overnight before making your chili the next day.
- Use homemade stock. I recommend using homemade stock, whether beef or chicken, whenever possible. It not only yields superior flavor and mouth feel than store-bought stocks, but it allows you full control over the sodium level in whatever dish you’re making. Refer to my homemade beef stock recipe for how to make it.
- Sweetness. Using a whole bunch of dried chiles will often result in a slightly bitter sauce. Feel free to balance it out with your sweetener of choice. Agave, honey, or sugar all work well, just go easy. The goal is to reduce some of the bitterness, not to make the chili sweet.
Want To Save This Recipe?
More beefy recipes
If you love chili colorado, here are a few recipes I think you’ll love!
- Peposo – Tuscan beef stew with red wine, black pepper, and chuck roast.
- Garlic butter steak bites – tender beef in a garlicky butter sauce.
- Pot roast – chuck roast braised with carrots and potatoes.
If you’ve enjoyed this Chili Colorado Recipe or any recipe on this site, give it a 5-star rating and tell us about it in the comments below.
We strive to satisfy a number of learning styles. If you are someone who prefers to learn by watching, you can find most of our recipes on YouTube and our Facebook Page.
Chili Colorado
Ingredients
For the dried chiles
- 6 dried ancho chiles stems and seeds removed
- 5 dried pasilla chiles stems and seeds removed
- 3 dried guajillo chiles stems and seeds removed
For the Chili Colorado
- 4 tablespoons lard or neutral oil divided
- 3 pounds chuck roast Cut into 1-inch cubes, remove any large pieces of fat
- 1 large yellow onion diced
- 5 cloves garlic minced
- 2 teaspoons Mexican oregano
- 2 teaspoons ground cumin
- 3 cups low sodium beef stock plus more as needed
- 1/4 cup crushed tortilla chips for thickening, optional
- 2 large bay leaves
- salt and pepper to taste
- agave or honey to taste, (optional)
Want To Save This Recipe?
Instructions
For the dried chilis
- Remove the stems and seeds from the dried chile peppers. Toast the chiles in a dry pan over medium heat for 30 seconds per side or until fragrant. Remove chiles from the heat to a large bowl and cover with hot water. Cover bowl with plastic wrap and allow the chiles to soften for at least 20 minutes.
- To a blender, add the reconstituted chiles and 1 cup of new clean water (not the chile soaking water) and blend until smooth.
For the chili
- Preheat oven to 300f and set the rack to the middle level.
- Heat a large Dutch oven to medium heat with the lard. Pat the beef cubes dry and season with salt and pepper. Sear the beef until browned on all sides working in batches if needed to not overcrowd the pan. Place the seared beef on a plate and set aside.
- Add the onions to the pot and cook until soft (about 7-8 minutes). Add the garlic along with the cumin and cook until fragrant (about 2 minutes).
- Add the chile sauce to the pot and cook for another 3 minutes while stirring frequently.
- Add the beef cubes back to the pot along with the oregano, bay leaves, and beef stock and bring to a boil. Once boiling turn off the heat and cover with the lid. Place the pot into the oven.
- After 90 minutes remove the lid and return to the oven for another 30-45 minutes or until the chili has thickened and the beef is tender. Note: If the beef still isn't fork tender, cook for another 20-30 minutes and check again. Add more beef stock if it starts to dry out.
- Remove the pot from the oven. If the chili hasn't thickened enough, add the tortilla chips and/or cook over medium-high heat stirring frequently until thickened to your liking.
- Taste test the chili and adjust salt and pepper as required. If the chili is too bitter add 1-2 teaspoons of agave or honey to balance it out. Serve in bowls topped with sour cream, jalapeno peppers, diced raw onion, queso blanco, cotija, or whatever you like. Enjoy!
Notes
- The single most important thing you can do to improve your chili is to make it one day in advance and refrigerate overnight! The flavors will be so much better.
- If the beef isn’t tender, simply continue to cook it in the oven and check again after 20-30 minutes.
- A mixture of chile peppers was used but you can substitute other mild chiles if you like.
- Leftovers can be saved for up to 3 days and can be reheated on the stovetop or in the microwave.
Nutrition
Nutrition information is automatically calculated, so should only be used as an approximation.
Follow Me
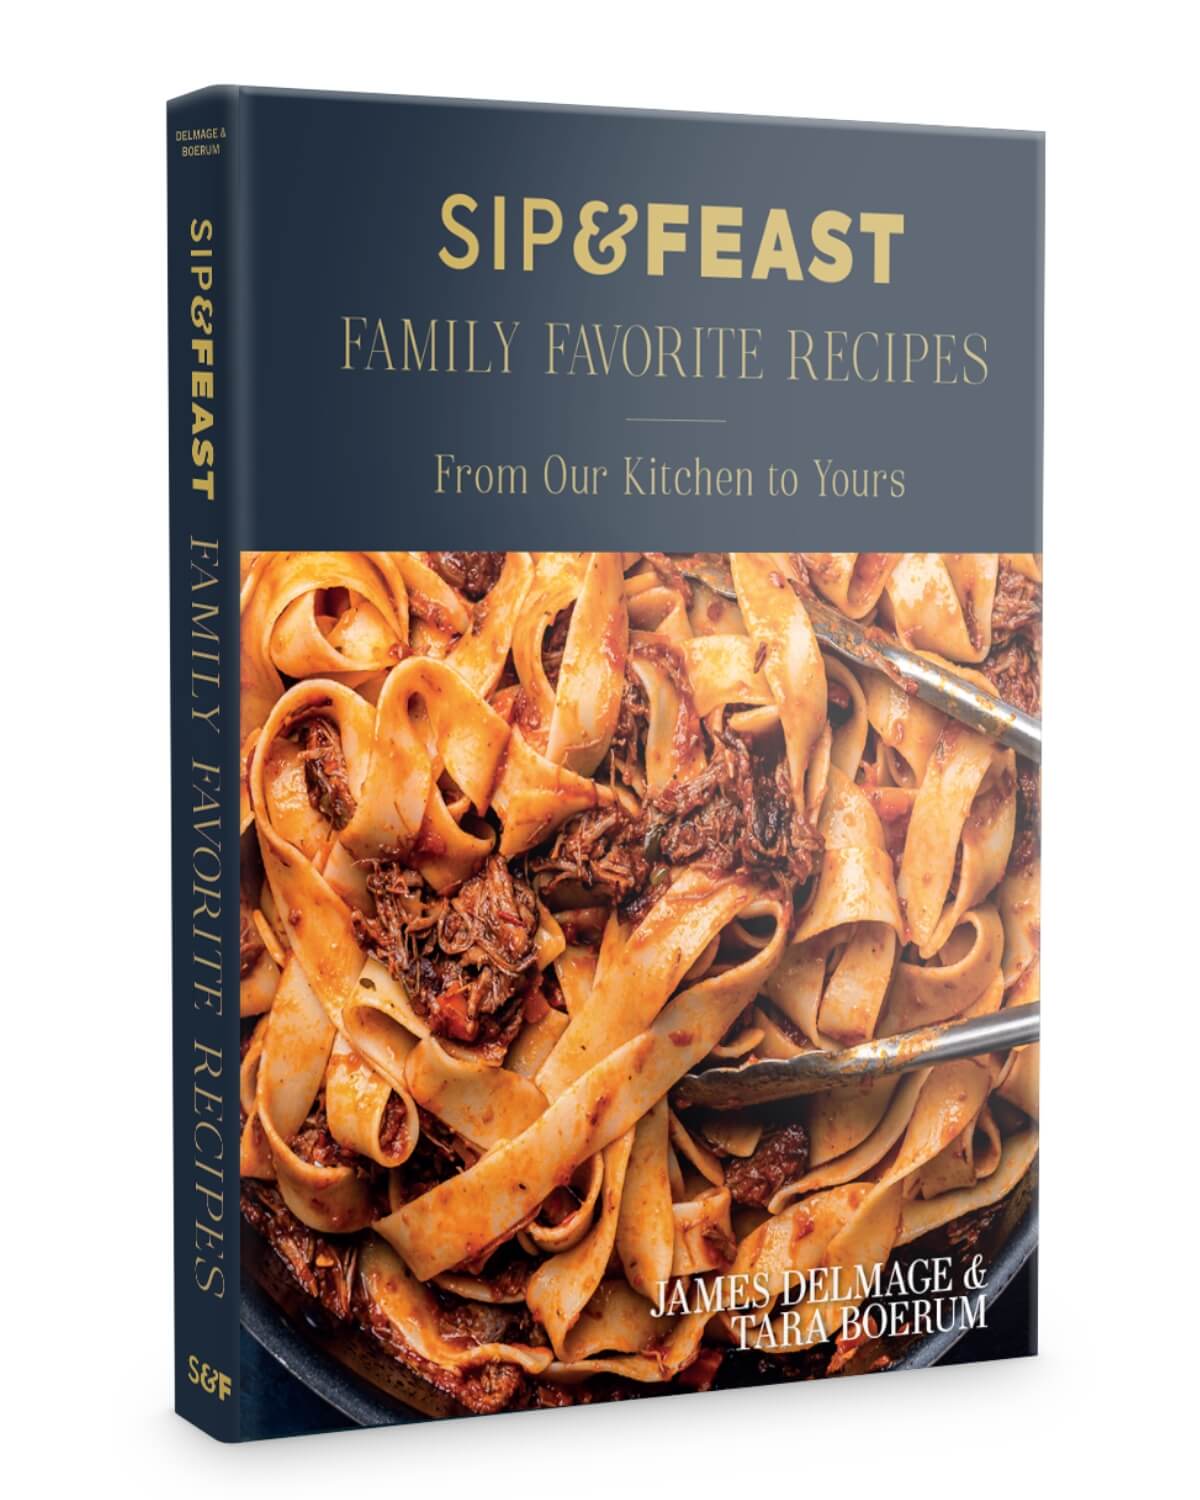
The Sip and Feast Cookbook
- 100+ recipes
- Essential tools and ingredients
- Entertaining ides
- Stunning photography


Big flavor from few ingredients and a very straight forward technique. High end Mexican restaurant quality.
Hi guys!! I substituted hatch dried chilies with the chillis you had suggested.It turned out amazing!! I also used the instant pot!! So good!
So glad you enjoyed, Julie!